
Clipchamp has no skin smoothing, beauty, or face retouch control. That is the answer, stated plainly. Clipchamp is a capable free editor built into Windows 11, and skin retouching is simply not one of the jobs it does. You can stop hunting through its tabs.
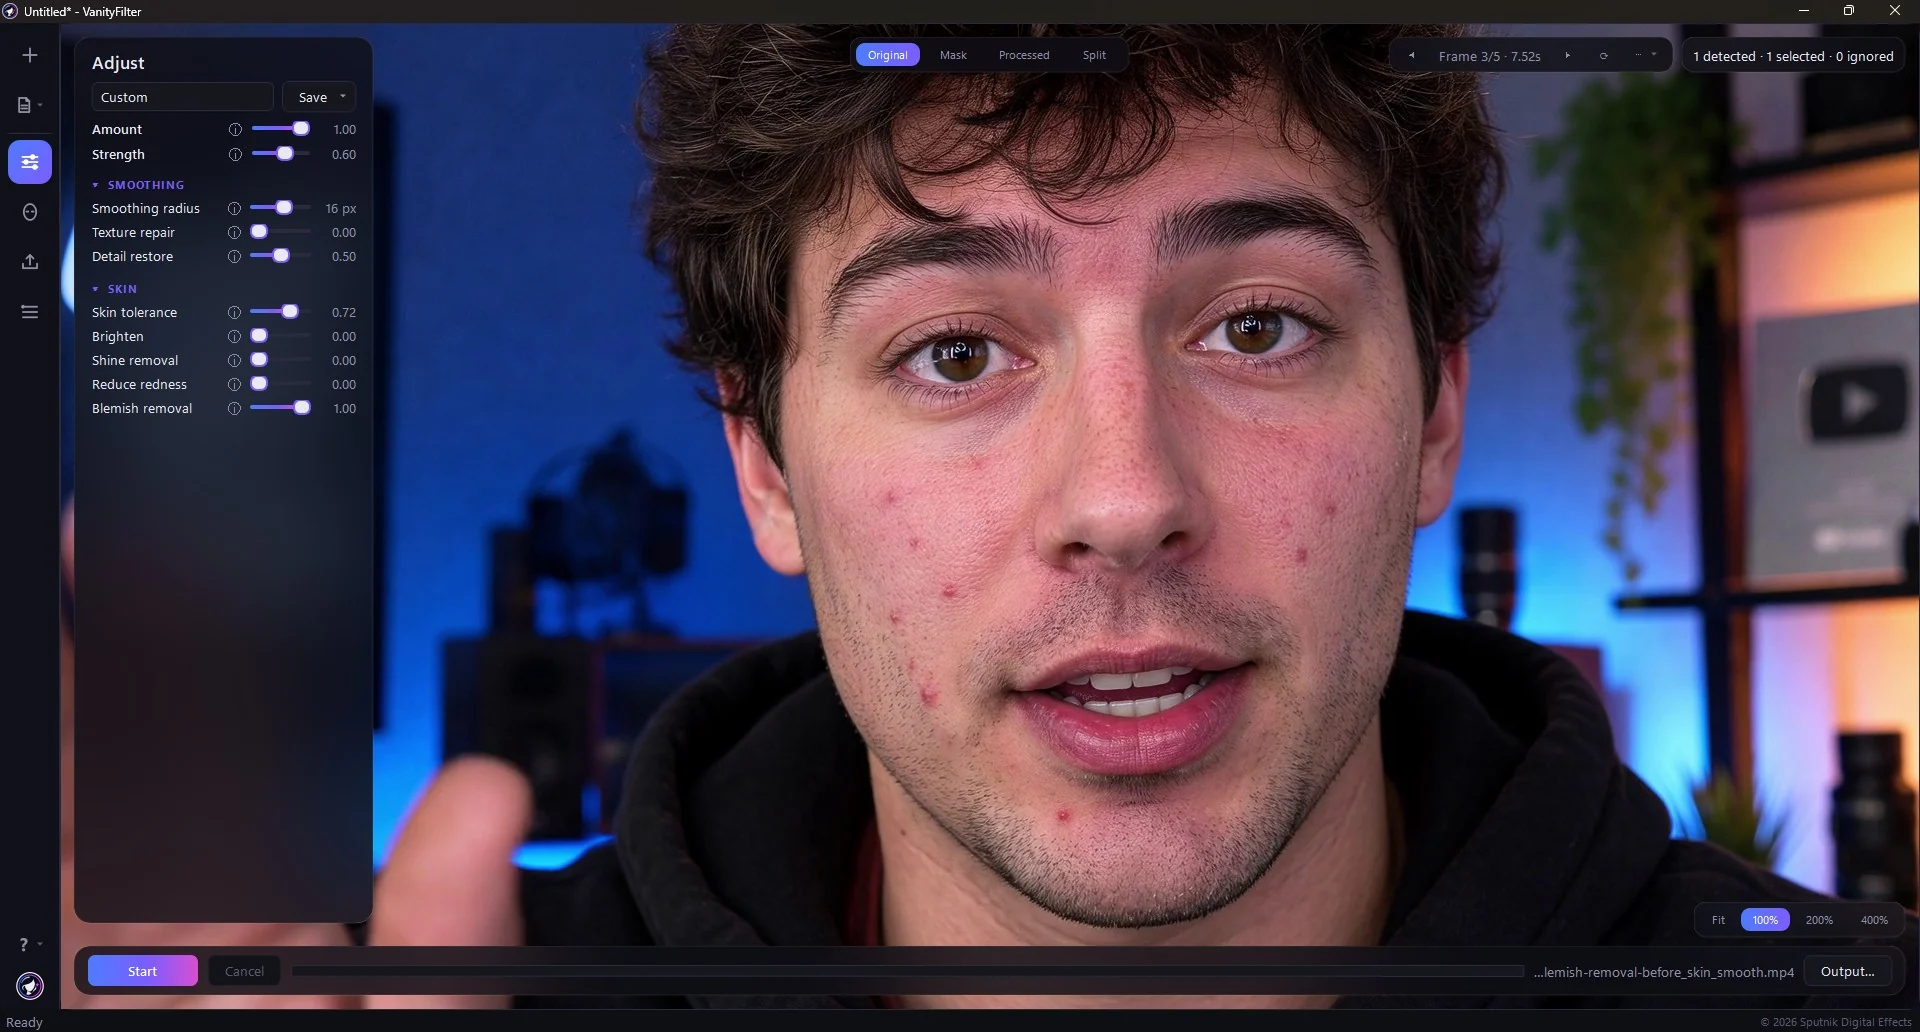
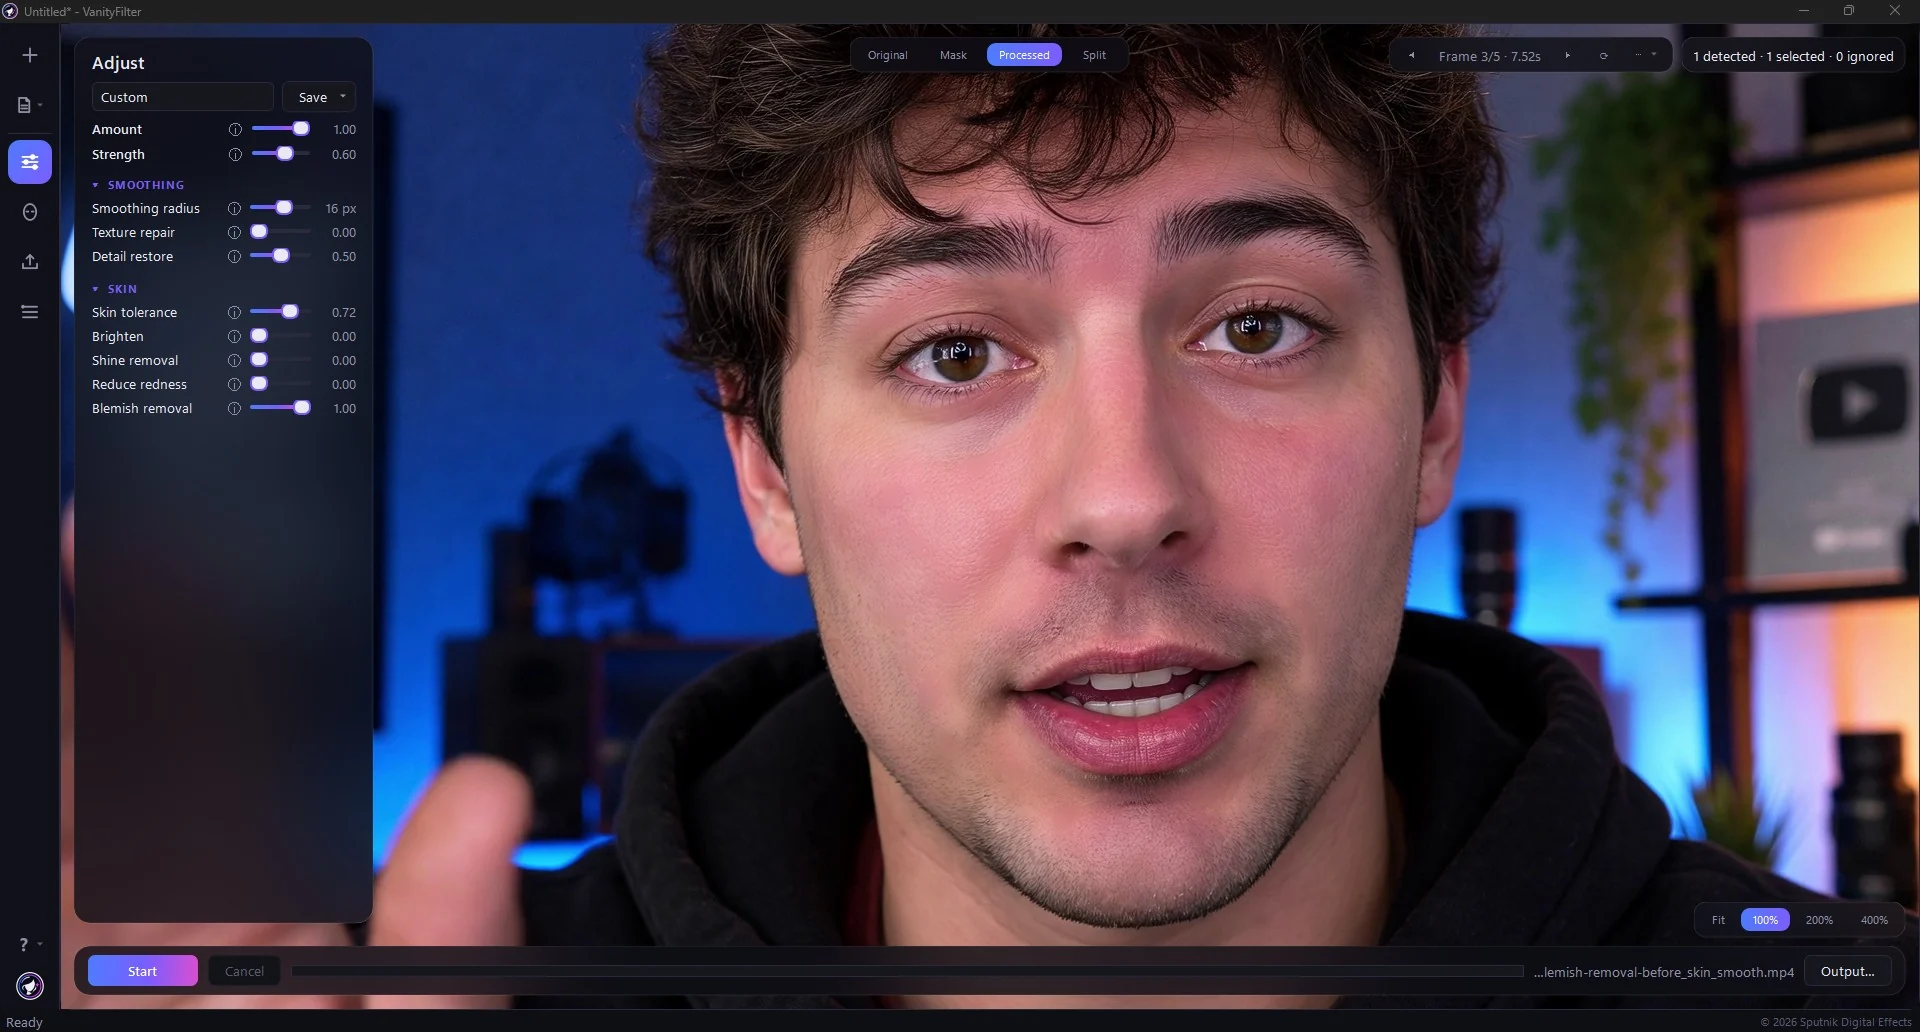
Real footage in VanityFilter 3.1.5, same frame, Original against Processed. The Adjust panel is left in shot so you can see the actual settings. The hair, hoodie and lit background are outside the mask, so they do not move.
The short version: the controls Clipchamp does have change color, exposure, and whole-clip appearance. None of them read a face. Cut in Clipchamp, and run a separate skin-only pass on Windows, ideally on the source clips before you import them so each shot can have its own treatment. Both applications still export a file.
What Clipchamp actually offers
Per current Microsoft support documentation, the Adjust colors tab holds exposure, contrast, saturation, temperature, transparency, and blend mode. These are global color moves. Exposure changes brightness across the whole frame. Contrast widens the gap between darks and lights. Saturation shifts color intensity. Temperature warms or cools everything. Transparency and blend mode control how a clip composites with what is beneath it.
The Filters tab applies color grading and visual overlays with an intensity slider. A filter changes the mood of the shot. It can warm a scene, cool it, or add a stylized look. What it cannot do is distinguish skin from a collar or a forehead from hair. The filter applies to every pixel in the frame equally.
The Effects tab holds effects including blur and blur fill. Those are the closest thing to a texture control, and they are still not retouching. A blur softens detail across the entire clip. It has no idea where a face is.
Here is what each control does to a face in a talking-head video:
- Exposure, contrast, saturation, temperature. Change brightness, color balance, and mood. Skin may look different, but pores and texture remain exactly as captured.
- Filters. Grade the whole image. A warm filter does not smooth a cheek.
- Transparency and blend mode. Composite layers. Useful for overlays, irrelevant to skin.
- Blur and blur fill. Soften everything in the clip, including eyes, hair, and background.
None of these read the face. None of them isolate skin. None of them preserve the eyes while smoothing the cheek. That is the gap you are trying to fill.
Why blur is not the answer
Blur in Clipchamp applies to a whole clip. Turn it up far enough to hide pores and you have also softened the eyes, the hair, the microphone, and the background. A talking-head video lives on the eyes and mouth. Blurring them to reach the skin is a bad trade.
Clipchamp’s own guidance for hiding one region is to split the clip or to crop a duplicate and stack it as picture in picture. That technique exists for privacy. It hides a license plate or a face you want to conceal. It is not skin work.
A rectangle does not follow a head that turns. The moment your subject moves, the blurred region sits over the wrong part of the frame. You would need keyframes on the position and size of that rectangle for every movement, and even then the edges of the blur would cut across the face visibly. Treating a privacy tool as retouching produces worse footage than doing nothing.
Two routes, and the one to prefer
You have two paths. The preferred route treats the camera clips on Windows before importing them into Clipchamp. The second route treats the finished export.
Route one: treat source clips before importing. Run the skin pass on the raw camera files first. The faces are already corrected when Clipchamp imports them. You then cut, arrange, add titles and music, and export once from Clipchamp. VanityFilter has already encoded the corrected source copy, so this is not a single-encode pipeline overall. Choose it when you want control over each source shot. The pre-edit workflow guide covers why that order matters across every editor, not just this one.
Route two: treat the finished export. This suits a cut that is already done. You export the finished video from Clipchamp, run the skin pass on that file, and get a final corrected version. Both routes have an export from each application. Visible generation loss depends on the footage and encoding settings; review the final file rather than assuming the extra export will be imperceptible.
In both routes, the Clipchamp work is the same. Cut your clips, arrange them on the timeline, add titles and music, and export at the highest quality your plan allows. Clipchamp export quality options are 480p, 720p, 1080p, and 4K. The 4K option requires a Microsoft 365 subscription or a Clipchamp premium plan. If your delivery target is YouTube, the compression guide explains why a higher-resolution export protects the detail a second encode would otherwise strip.
Run the local skin pass
The skin pass runs on Windows as a separate file step. It is not a Clipchamp plugin, extension, or integration. It does not run in real time. You feed it video files and it writes corrected files.
Sample a representative frame first
VanityFilter’s preview browser samples frames across the video evenly, randomly, or at an exact timestamp. Inspect each sample in four views: processed, mask overlay, original, and side by side. Pick a frame where the speaker is talking and moving, not a still moment that flatters the settings.
The mask overlay is the check that matters. Smoothing must stop at skin and leave eyes, brows, lips, hair, caps, and collars alone. The mask stops where skin stops. If the mask bleeds onto hair or a collar, the smoothing will too, and you will see it in the final export.
Set the Master Amount low. This wet/dry dial scales the whole effect between the original and the full result. Start near the original and raise it only after the mask reads correctly. A restrained pass that holds up across the whole video beats an aggressive pass that looks good on one frame and falls apart on the next.
Watch motion. The edges where skin meets hair and glasses are where artifacts appear. A head that turns, a hand that crosses the face, a strand of hair that falls across the forehead: those are the moments that expose a bad mask. Check several frames across the video, not just the first one.
Export at the source dimensions. If the source is 1080p, export 1080p. Upscaling in the skin pass adds nothing, and downscaling throws away detail you might still want for the Clipchamp edit.
Honest limits
The limits are documented rather than hidden. Variable-frame-rate phone footage exports as constant frame rate. Very small or heavily covered faces, a hand across the face for example, are skipped for those frames, and the mask fades out smoothly rather than flickering.
Up to five faces are detected per frame. That matters only when a second person appears in shot. For a solo talking-head video the count is one. If you are weighing this against the other Windows options, the Windows software comparison lays out what each approach actually does to a face.
Where VanityFilter fits
VanityFilter is a separate offline Windows file step. It takes MP4, MOV, AVI, or MKV input and writes GPU H.264 with AAC audio or ProRes 422 HQ with PCM audio. The original audio is preserved. It runs on Windows 10 or 11 64-bit, with an optional NVIDIA GPU. It works offline, so footage never leaves the machine.
Position it narrowly: it is the skin pass that Clipchamp does not have. It is not a replacement for Clipchamp. You still cut, arrange, title, and export there. VanityFilter handles the one job Clipchamp cannot.
Which route fits your situation
The shoot has not happened yet. Plan for the skin pass before you record. Shoot at a fixed frame rate rather than variable. Light the face evenly so the mask has clean edges to work with. Keep hair off the forehead where you can. Those choices make the later mask cleaner. When the clips exist, run the source-clip route before importing.
The clips exist and Clipchamp editing has not started. Run the source-clip route. Treat the camera files first, then import the corrected files into Clipchamp. This gives you per-shot control before the edit. It does not eliminate VanityFilter’s own encoding step.
The Clipchamp export is already finished. Run the after-export route. Treat the finished file and accept the one extra encode. That is the right call when the cut is locked and you do not want to rebuild the timeline.
FAQ
Does Clipchamp have a skin smoothing tool?
No. Clipchamp has no skin smoothing, beauty, or face retouch control. Its Adjust colors, Filters, and Effects tabs change color and whole-clip appearance, not skin texture.
Can I blur just the face in Clipchamp?
Not cleanly. Blur applies to a whole clip. Clipchamp’s guidance for hiding one region is to split the clip or stack a cropped duplicate as picture in picture, which is a privacy technique that does not follow a moving head.
Will a filter or color adjustment smooth skin?
No. Filters and color adjustments change mood, exposure, and color balance across the whole frame. They cannot distinguish skin from hair or clothing.
What is the best way to smooth skin in a Clipchamp project?
Treat source clips before editing when each shot needs its own settings. Treat the finished export when the cut is already approved. Both routes include a VanityFilter export and a Clipchamp export; neither guarantees just one encoding step overall.
Does VanityFilter work inside Clipchamp?
No. VanityFilter is a separate offline Windows file step. It processes video files and writes corrected files that you then import into Clipchamp or export from it.
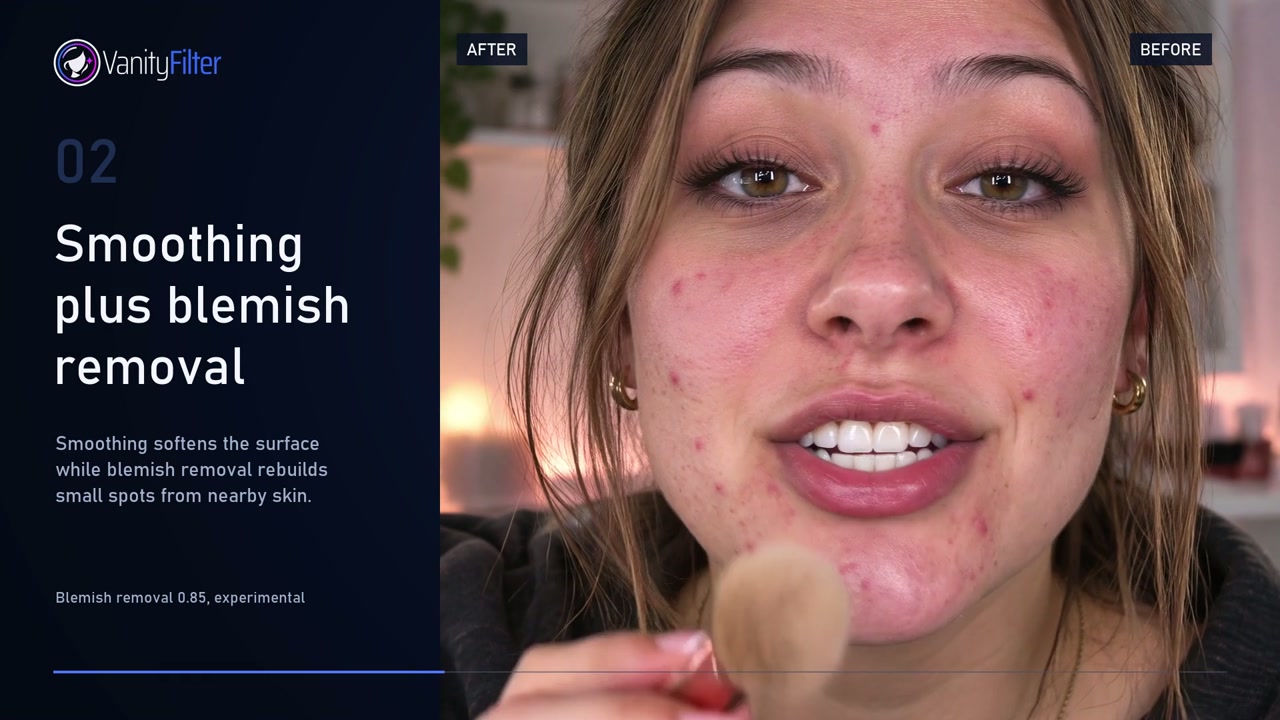
VanityFilter processes video offline on Windows. There is no subscription. See current pricing.