Face shine is a brightness problem before it is a smoothing problem. A hard light catches the forehead, nose, or cheeks and creates a hot spot. Blur the whole face and the hot spot may still be there, except now the pores around it are gone too. The better fix is local: control the bright patch, preserve the shape of the face, and leave the eyes, hair, and microphone alone. Drag the comparison below to see a real VanityFilter pass on a difficult streaming shot.
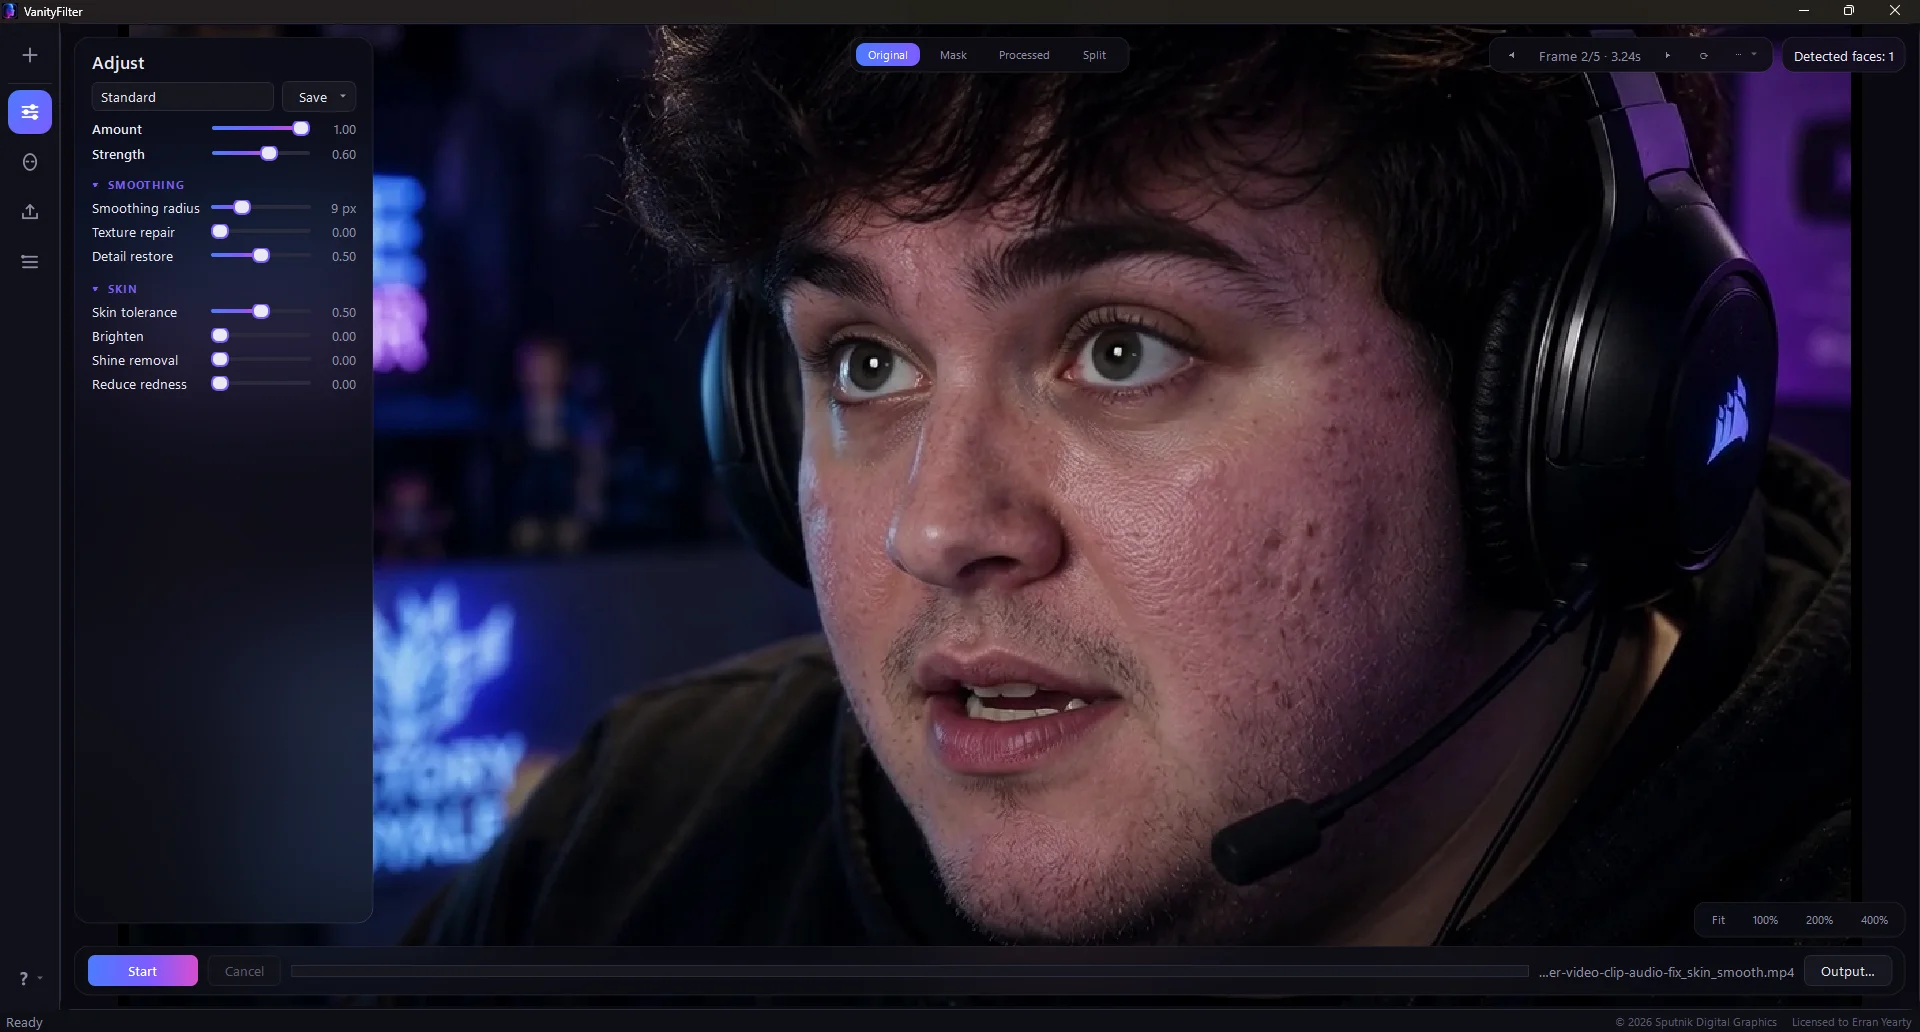
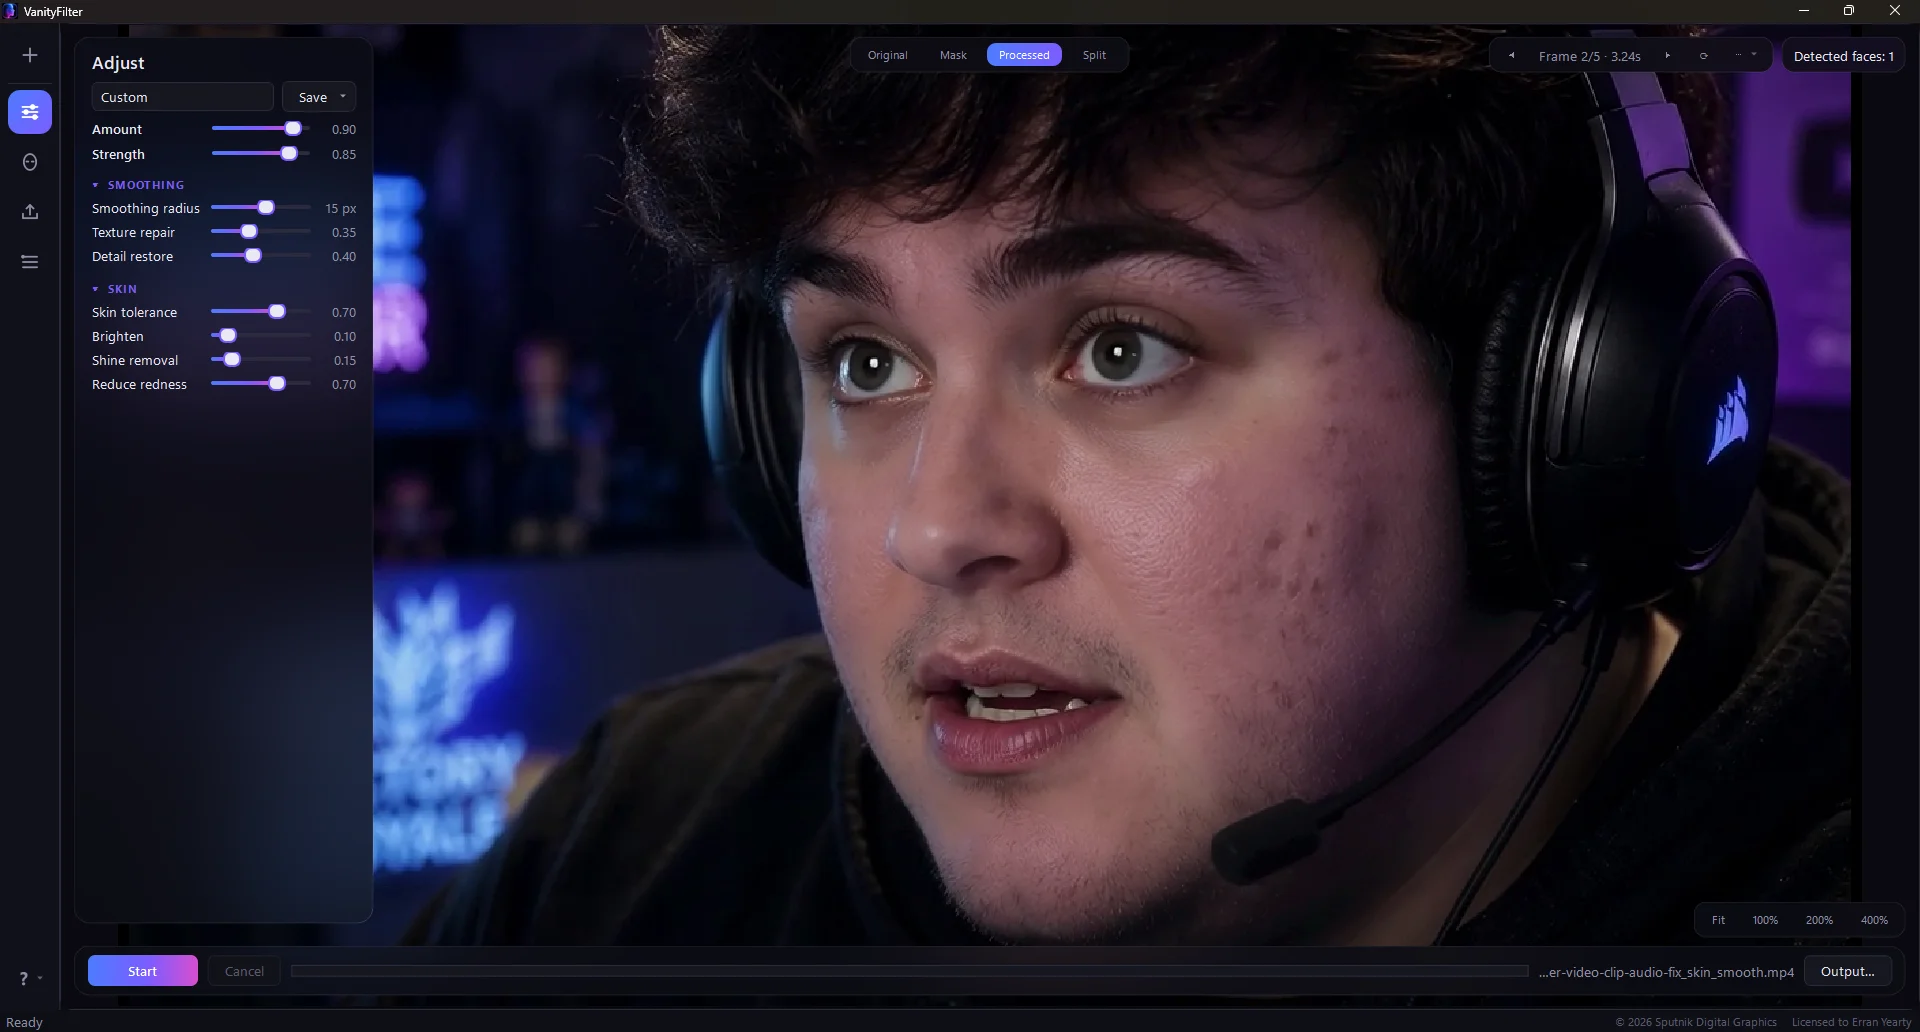
The actual VanityFilter window at Shine removal 0.15 and Reduce redness 0.70. Those are settings from this test, not a universal preset.
The short version: soften or move the light if you can. In Premiere Pro, isolate the shiny skin with a feathered, tracked mask and lower Highlights and Whites gently. For a folder of talking-head footage, a skin-specific offline pass is faster because the correction is baked into clean clips before the edit starts.
Why shiny skin is harder than it looks
The bright patch is a specular reflection. It moves when the face or light moves, and it often sits beside perfectly good skin detail. That is why a global fix feels wrong. Pull Highlights down across the full frame and the face may improve, but a window, white shirt, or practical lamp also loses energy.
There is a hard limit. When the shine clips to pure white, the camera has recorded no texture in that spot. Post-production can lower the white patch, but it cannot rebuild pores that are absent from the file. A reshoot is the clean fix when a key facial area is badly clipped.
Fix the shine before you record
A minute on set beats ten minutes of tracking. Blot the skin immediately before the take. Move a small hard source farther away or diffuse it. If the nose catches a bright reflection, change the angle of the light or camera instead of simply dimming the source. The goal is not a matte face. Keep enough highlight to show the curve of the cheek and bridge of the nose.
Check the forehead at full camera exposure, not only on a dim field monitor. If one color channel is clipping, expose or light for that skin highlight before you worry about the background.
Reduce face shine in Premiere Pro
Premiere can handle a single shot without a beauty plugin. The clean route is a local Lumetri correction:
- Add Lumetri Color to the clip. Work on an adjustment layer only if the same correction truly belongs on every shot under it.
- Draw an ellipse or pen mask around the shiny skin. Keep it off the eyes, eyebrows, lips, and hairline.
- Feather the mask until its edge disappears. A broad, soft transition is safer than a tight shape that follows every pore.
- Track the mask forward. Review the track when the subject turns, covers the face, or leaves frame.
- Lower Highlights first. Nudge Whites only if the hottest pixels still pull attention. Stop while the face still has dimension.
- Toggle the effect at full resolution. If the corrected patch looks gray, flat, or pasted on, reduce the adjustment and widen the feather.
Adobe’s current documentation confirms that Lumetri’s Highlights control adjusts highlight clipping, and its mask tools can isolate adjustments to a selected area. See Adobe’s basic color correction options and isolated adjustments using masks. For the full skin-retouch workflow, including the built-in blur method, read how to smooth skin in Premiere Pro.
Keep shine correction separate from smoothing
Shine removal controls brightness. Skin smoothing controls texture and uneven color. They can work together, but turning one slider up to solve both usually gives you a dull forehead surrounded by soft, plastic skin.
What to judge in the before and after
Look at the bridge of the nose, forehead, and upper cheeks first. The brightest patches should stop pulling your eye, but the face should still have shape. Then check eyelashes, facial hair, headset edges, and the microphone. If those soften or shimmer, the mask or smoothing pass is doing too much.
At 4K, inspect the result at 100 percent and again at normal viewing size. A correction can look too weak when you are studying pores at 300 percent, then look heavy after YouTube compression. Our guide to natural-looking video skin smoothing explains what makes a result look fake before the audience can name the problem.
The faster offline route for talking-head footage
Mask tracking is reasonable for one hero shot. It gets tedious across a podcast, course, or YouTube backlog. VanityFilter is a standalone Windows app built for that pre-edit job. It detects up to five faces, creates an independent skin mask for each person, and keeps the correction off eyes, lips, hair, glasses, clothing, and the background.
The Shine removal and Reduce redness controls sit beside the texture controls, so brightness and skin detail can be judged separately. Processing stays on the workstation. Export H.264 for a quick turnaround, ProRes 422 HQ for an editing master, or a grayscale mask matte when you want to finish the correction inside Premiere or Resolve.
The useful part is the order of operations. Process the raw clips once, then edit the clean exports without adding a face effect to every timeline cut. The full batch method is in Smooth Skin Before You Edit.
When to stop fixing and reshoot
Reshoot when the forehead or nose is clipped through a long section, the tracked mask keeps crossing hair or eyes, or the reflection changes shape faster than the correction can follow. Also reshoot when reducing the patch makes the surrounding skin noisy. That means the original exposure left too little useful information.
If a reshoot is impossible, aim for less distracting, not invisible. A believable highlight is better than a flat gray patch that announces the correction.
FAQ
How do I remove face shine from a video?
Start by lowering the brightest skin highlights inside a soft, tracked mask rather than lowering highlights across
the whole frame. Keep some natural highlight on the cheeks and nose. If the hot spot is clipped to pure white, no
editor can recover texture that the camera did not record.
Can Premiere Pro reduce oily skin shine?
Yes. Add Lumetri Color, draw a mask around the shiny skin, track the mask, feather it, then lower Highlights and
Whites gently. Adobe documents both Lumetri highlight controls and isolated color adjustments with masks. Check the
track whenever the face turns or leaves frame.
Why does lowering highlights make the whole video dull?
A global Highlights adjustment also changes lamps, windows, clothing, and every other bright part of the shot.
Isolate the face with a mask, or use a skin-specific tool, so the correction stays where the shine is.
Does skin smoothing remove shine?
Blur-style skin smoothing may soften the edge of a shiny patch, but it does not necessarily control its brightness.
Treat shine and texture as separate problems. Reduce the hot spot first, then add only as much smoothing as the shot
needs.
Can VanityFilter reduce shine without uploading footage?
Yes. VanityFilter processes footage locally on Windows. Its Shine removal and Reduce redness controls work inside
per-person skin masks, and the app can export H.264, ProRes 422 HQ, or a grayscale mask matte without uploading the
video.
Related: How to smooth skin in Premiere Pro · Get VanityFilter