
Most tutorials treat skin retouching as the last effect on a finished edit. The alternative is to run one pass over the raw clips first and cut with clean plates. This guide is the repeatable version of that idea: choose the settings on frames that represent the whole shoot, save them as a preset, send the folder to a separate output directory, and check every export before it goes anywhere near a timeline. Drag the slider to see the kind of plate you would be editing with.
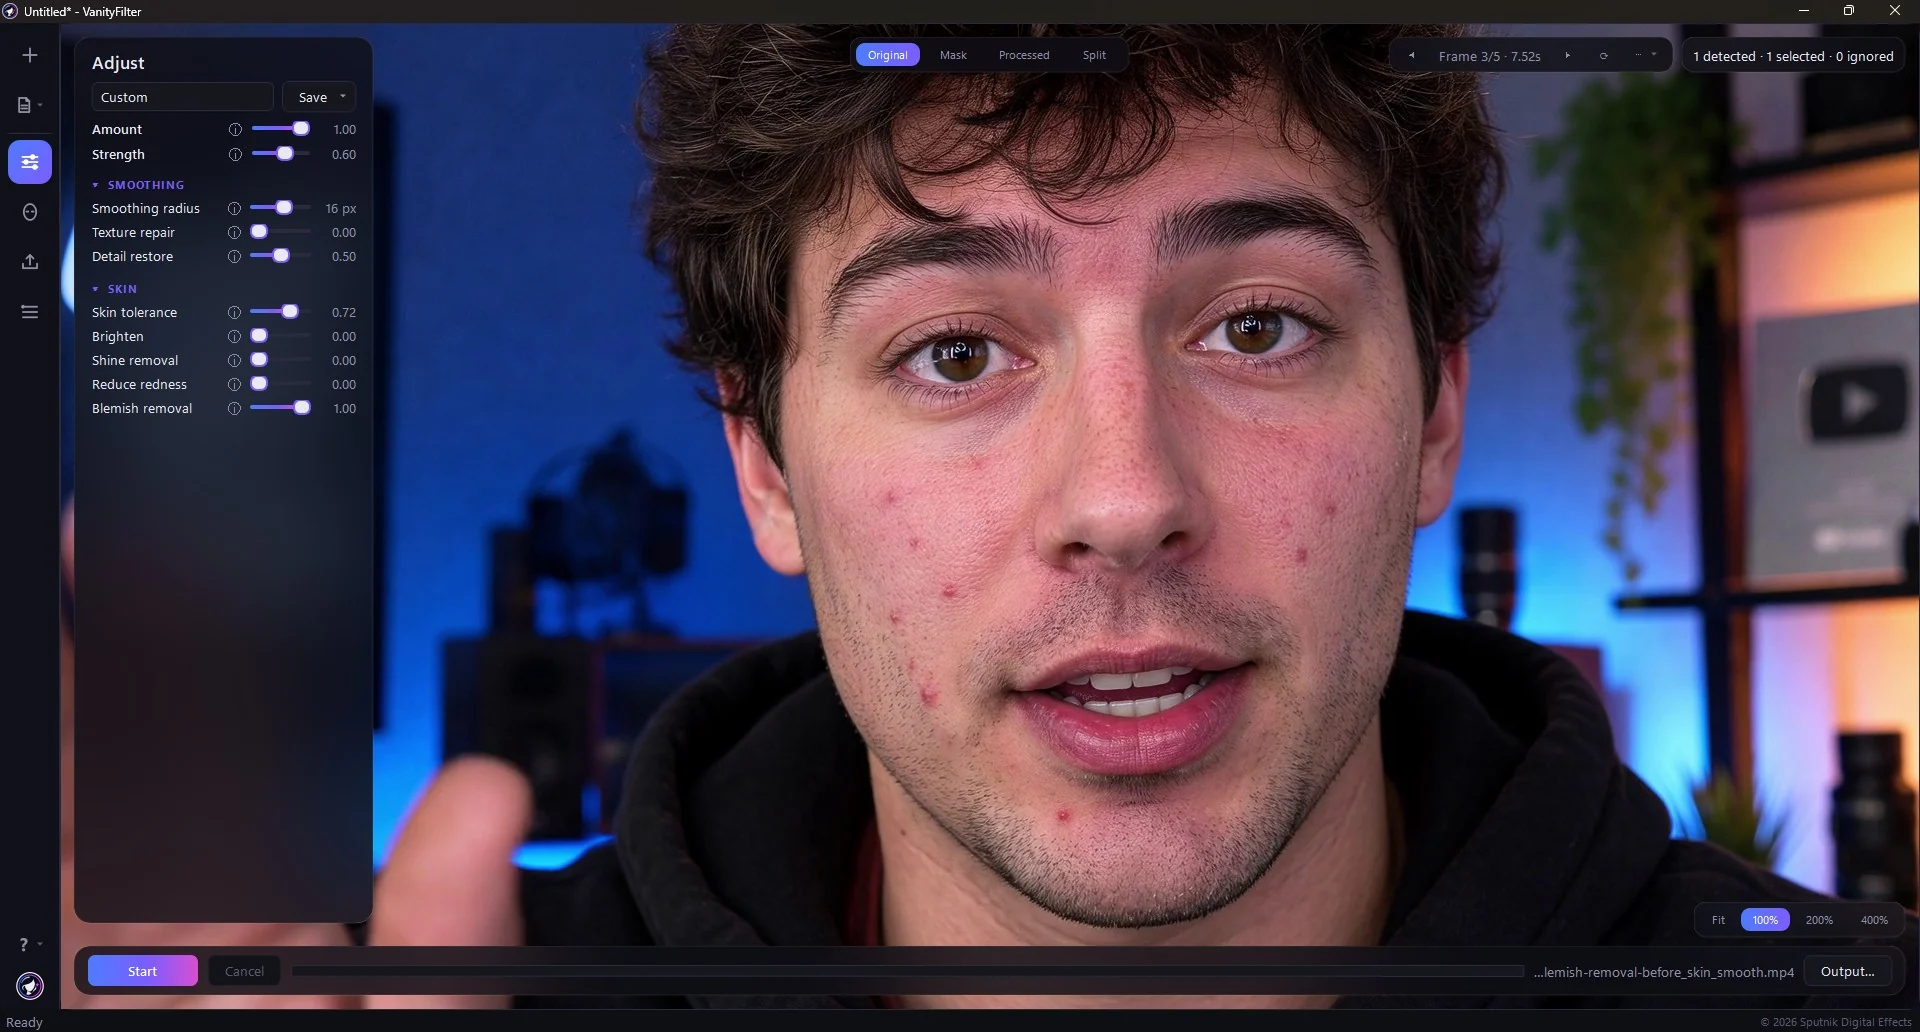
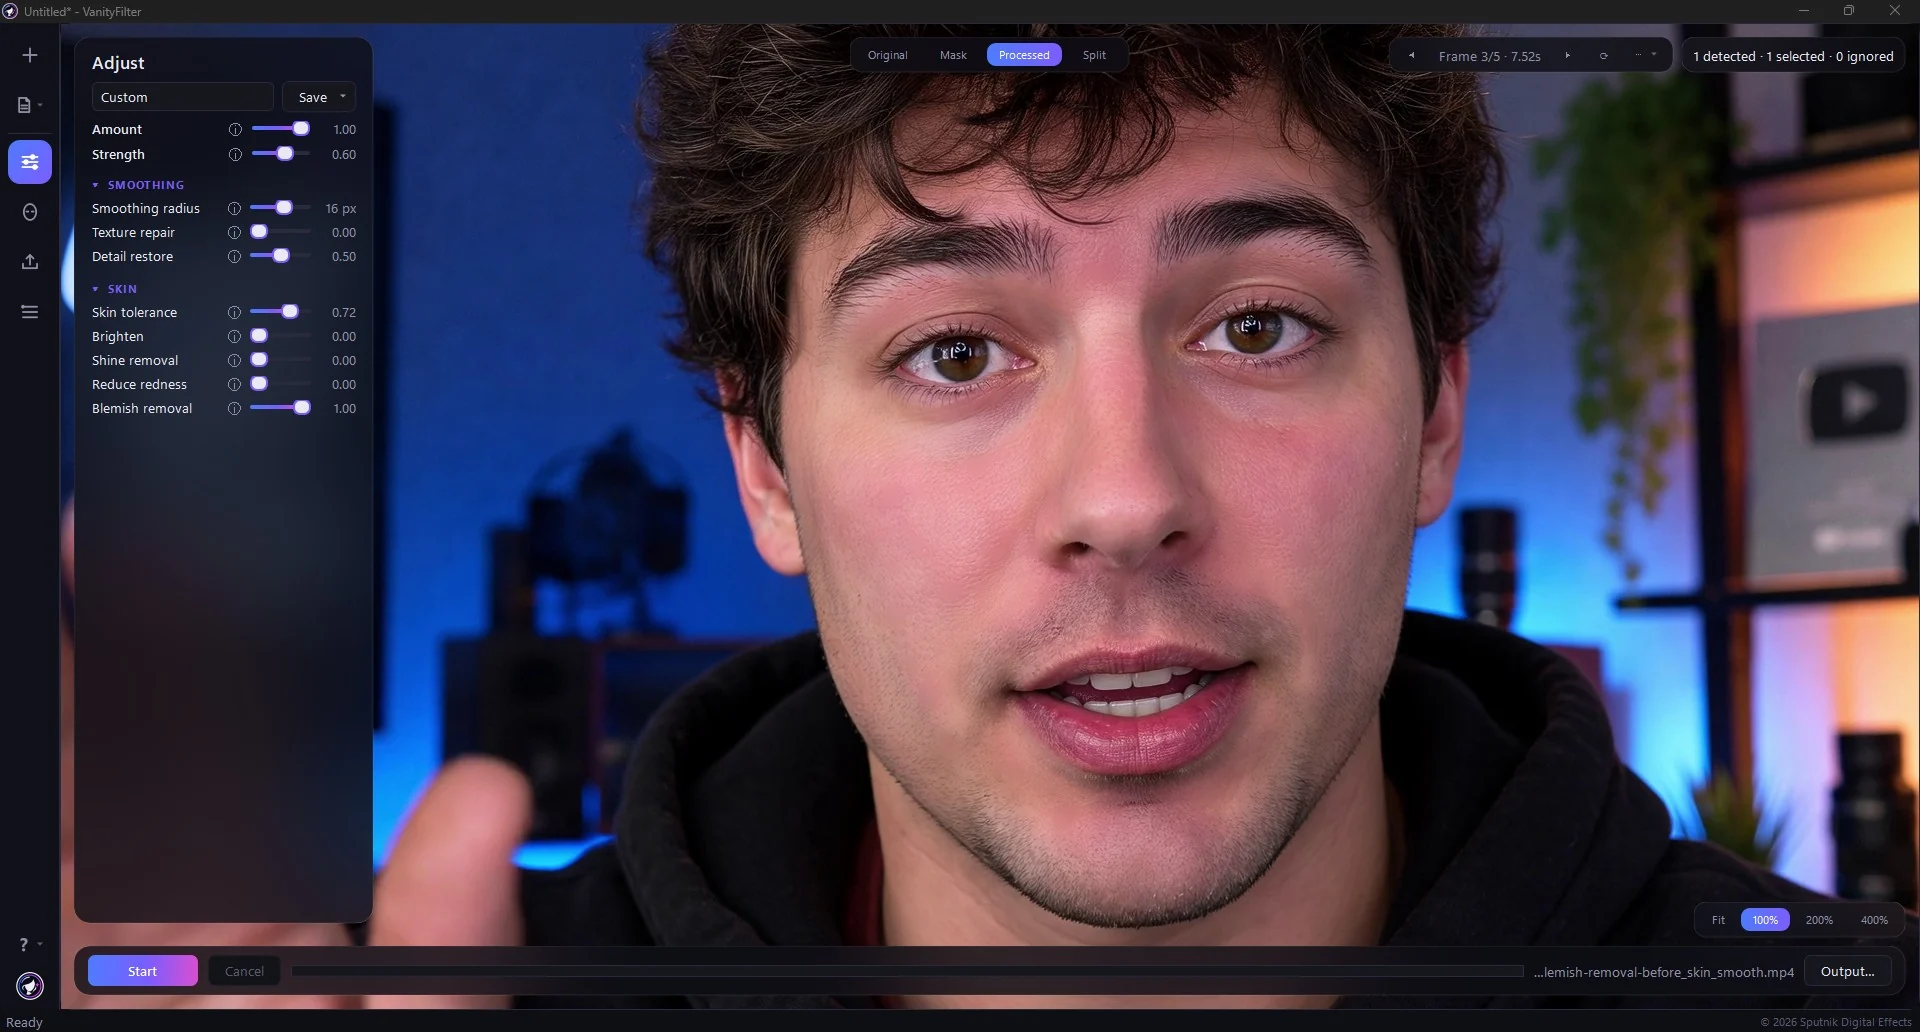
Real footage in VanityFilter 3.1.5, same frame, Original against Processed. The Adjust panel is left in shot so you can see the actual settings. The hair, hoodie and lit background are outside the mask, so they do not move.
The short version: Test on one representative clip, save a User preset, batch the folder into an empty output directory with the settings sidecar on, then review each file. Your originals are never overwritten, every clip gets the identical treatment, and the timeline carries no per-clip beauty effect. Whether that saves you time depends on your editor and hardware; this guide does not promise a number.
Why do the retouch before the edit
When smoothing lives on the timeline, every talking-head clip carries its own effect, its own mask and often its own tracking. Each duplicate, trim or speed change is another instance to check, and the editor recomputes the effect whenever it renders. Processing the source files once moves that work in front of the edit. You make one decision about the look, apply it to the whole shoot, and the editor receives ordinary video.
- One decision, applied consistently. The same preset runs on every clip, so faces match from cut to cut without per-clip tweaking.
- Nothing to mask or track in the editor. VanityFilter builds its own per-person skin mask, so the timeline has no beauty layer at all.
- The originals stay put. Output is always a new file. Change your mind and rerun from the raws.
- A record of what you did. The optional settings sidecar stores the exact values used for each export, so a reshoot next month can match this one.
On speed: removing effects from a timeline usually helps, but the size of that difference depends on your editor, what else is on the clips, and your machine. We have not timed an edit with and without pre-processed plates, so treat that part as something to measure on your own project. What we have measured is the batch step itself.
Five clips, 75 seconds of 1920x1088 footage at 24 frames per second, run through VanityFilter 3.1.5 on a Core i7-13700K with an RTX 3080:
- Standard preset: 4 minutes 37 seconds and 4 minutes 59 seconds across two runs, about 6 frames per second.
- Every treatment on (brighten, shine removal, redness reduction and blemish removal): 9 minutes 40 seconds, about 3 frames per second.
That is roughly four times the footage duration at Standard, and roughly eight times with everything running. Your hardware, resolution and settings will move those numbers. The planning point is that a batch is something you start and leave, and figures like these tell you whether that means a coffee break or overnight.
If you are still deciding whether a standalone pass belongs in your kit at all, the Windows skin-smoothing software comparison weighs this approach against in-editor effects and Resolve’s built-in tools.
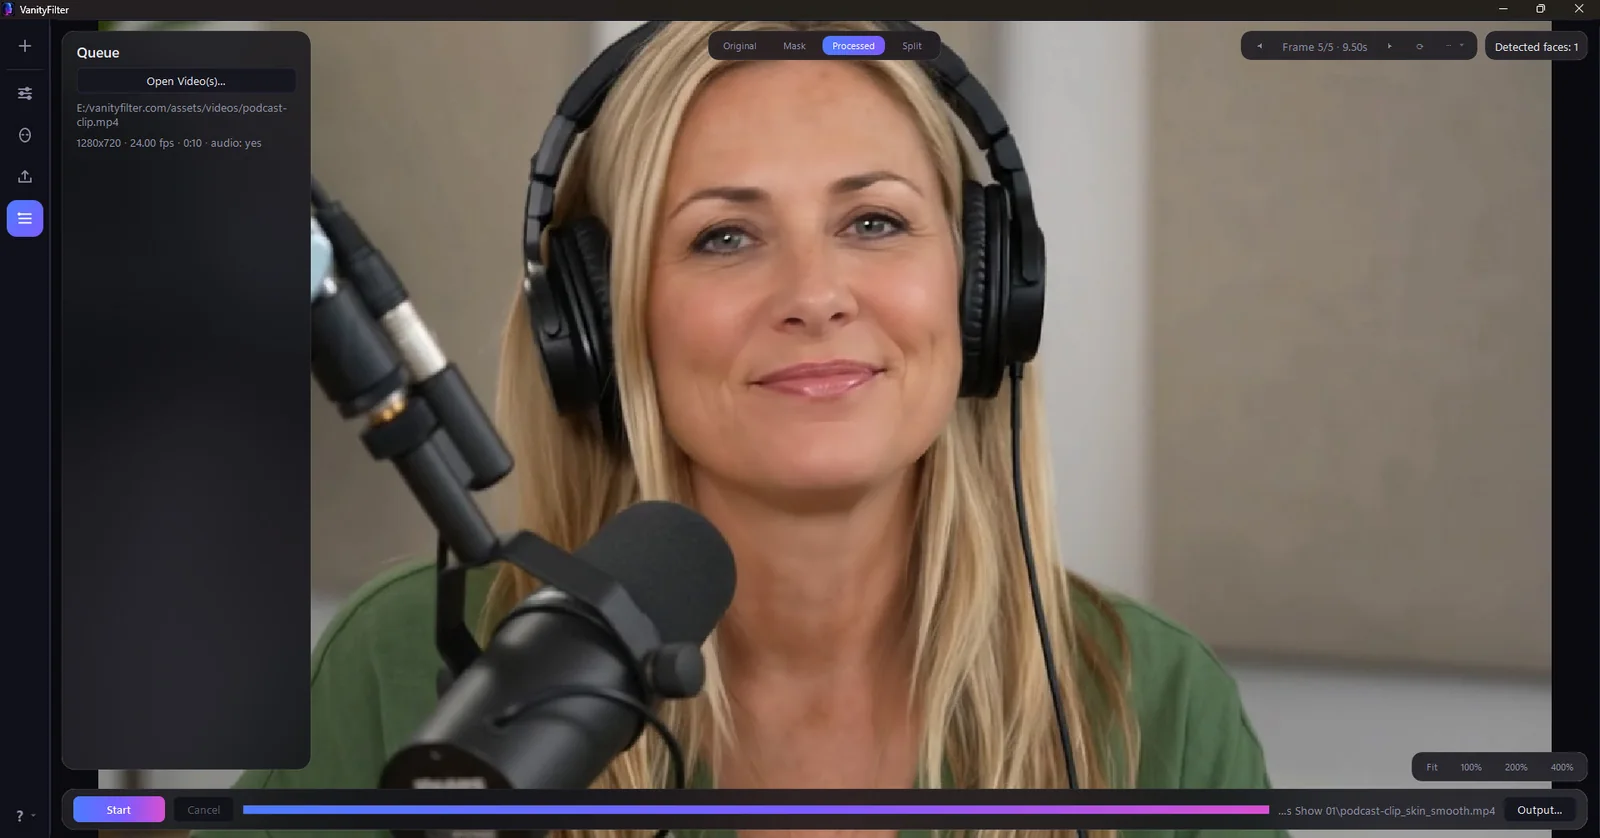
Step 1: Choose the settings on representative frames
A batch is only as good as the one clip you judged it on, so pick that clip deliberately. Load a typical file from the shoot, then re-sample the preview frames with the ↻ control so the set includes movement, a turned head, glasses or facial hair if anyone has them, and any point where the light changes. Pick a preset and adjust Amount. Switch to the Mask view to see exactly which pixels are treated and to the Split view at 200 percent to judge texture against the original. The goal is a setting that survives the hardest frame, not the prettiest one. Our guide on how to smooth skin in video without looking fake covers what to look for at the skin edge.
For clips with several people, decide now whether everyone gets treated (up to five faces per frame) or only the
main subject. In the CLI that is --primary-only, and --min-face ignores small background
faces.
Step 2: Save the preset
Click Save next to the preset dropdown and choose a slot from User 1 to User 4. The slots persist
across restarts and are the same names the command line accepts, so --preset "User 1" reproduces the
GUI result exactly. You can also save the settings as a .vfpreset file to keep with the project or hand
to an editor on another machine. Moving any slider afterwards switches the preset to Custom, so save first and leave it
alone during the batch.
Step 3: Run the batch into a separate folder
Load every clip from the shoot, either through the file picker with multi-select or by dropping the files or the
folder on the window. Non-video files are ignored. With more than one clip loaded, the Export tab’s output field
becomes an output directory. Point it at an empty folder rather than the source folder. By default each output is named
<clip>_skin_smooth.mp4, or .mov for ProRes, and VanityFilter reserves every name in
advance so nothing in the batch can collide with a source or another output. Existing files in the destination are
replaced, which is the practical reason to use a fresh folder per pass.
Choose the codec, turn on the settings JSON sidecar, and start. Files process one at a time. A file that fails does not stop the rest, Cancel removes any partial output, and completed exports are left intact. Before encoding, VanityFilter checks the source frame timing; if a clip is variable frame rate or its timing cannot be verified you will see a warning. Converting that clip to constant frame rate first avoids drift in the export.
To script the same run, use the command-line tool that ships in the VanityFilter install folder. It uses the license you activated in the app on the same machine. A ten-second test on one clip first is cheap insurance:
vanityfilter-cli clip.mp4 --preset "User 1" --start 1:30 --end 1:40 -o clip_test.mp4Then the batch. Windows shells do not expand wildcards for the tool, so list the files or let PowerShell do it:
vanityfilter-cli (Get-ChildItem .\raw\*.mp4).FullName --preset "User 1" --output-dir .\smoothed --sidecarAdd --codec prores for ProRes 422 HQ, or --export-mask to write a grayscale matte next to
each output for a track-matte workflow (not available on the free trial). The tool prints [i/N] name before each file’s progress bar,
and its exit code is 0 only when every file succeeded, so a scheduled task can tell whether the whole batch was clean.
--start and --end apply to single-clip runs only.
Step 4: Review every export before editing
Do not import the folder blind. Use Play result or Open output folder and check each file at the frames you sampled in step 1: the hairline, glasses, the jaw against a collar, and any moment the head turns. Confirm the audio is present. If one clip needs a different treatment, rerun only that clip with adjusted settings, since the originals are untouched and the sidecar tells you what the rest of the batch used. Only then import the reviewed files into Premiere, Resolve, CapCut or whatever you cut in, and edit as normal.
When you would still do it in the edit
The pre-edit pass suits talking-head and multi-camera shoots where most clips need the same look. If you only need smoothing on one hero shot, or you want the retouch inside your color pipeline, keep it on the timeline. VanityFilter can also export a grayscale mask matte you drop into your NLE as a track matte. We walk through that route, and how it compares to Resolve’s built-in Face Refinement, in DaVinci Resolve vs. VanityFilter, and the matte handoff for both editors in the mask matte guide.
FAQ
Should I smooth skin before or after editing?
Before, when many clips from the same shoot need the same treatment. One saved preset applied to the whole folder gives
every clip the same look, and the timeline carries no per-clip beauty effect to mask or track. After, inside the
editor, when only one or two shots need it or when the retouch has to live inside your color pipeline.
Does pre-smoothing footage make my edit faster?
It removes the per-clip beauty effect from the timeline, so the editor is not computing smoothing while you cut or
export. Whether that shortens your edit depends on your editor, your other effects and your hardware, and we have not
timed that comparison. We have timed the batch step: 75 seconds of 1080p footage took between 4 minutes 37 seconds and
4 minutes 59 seconds at the Standard preset, and 9 minutes 40 seconds with every treatment on, on a Core i7-13700K with
an RTX 3080 running VanityFilter 3.1.5.
What format should I export from VanityFilter for editing?
ProRes 422 HQ if your editor and drive can handle it, since it holds up through grading and another encode. H.264 is
fine for lighter setups. The audio track comes along either way: AAC in the MP4, PCM in the ProRes MOV.
Will smoothing raw footage lock me into a look?
No. VanityFilter writes a new file next to or in a folder of your choosing and never replaces the source, so the
originals stay untouched. If you want a lighter or heavier pass, change the preset and run the batch again from the raw
files. The settings JSON sidecar records exactly what each export used.
Get VanityFilter for Windows → Watch it work on real footage
Related: Windows skin-smoothing software comparison · How to smooth skin in video without looking fake · Resolve vs. VanityFilter