
A finished beauty pass is convenient. A skin matte is more useful when the grade is still moving. It gives Premiere Pro or DaVinci Resolve a frame-by-frame map of the skin, so you can warm a face, soften texture, or pull down shine without asking the same automatic tool to make every aesthetic decision.
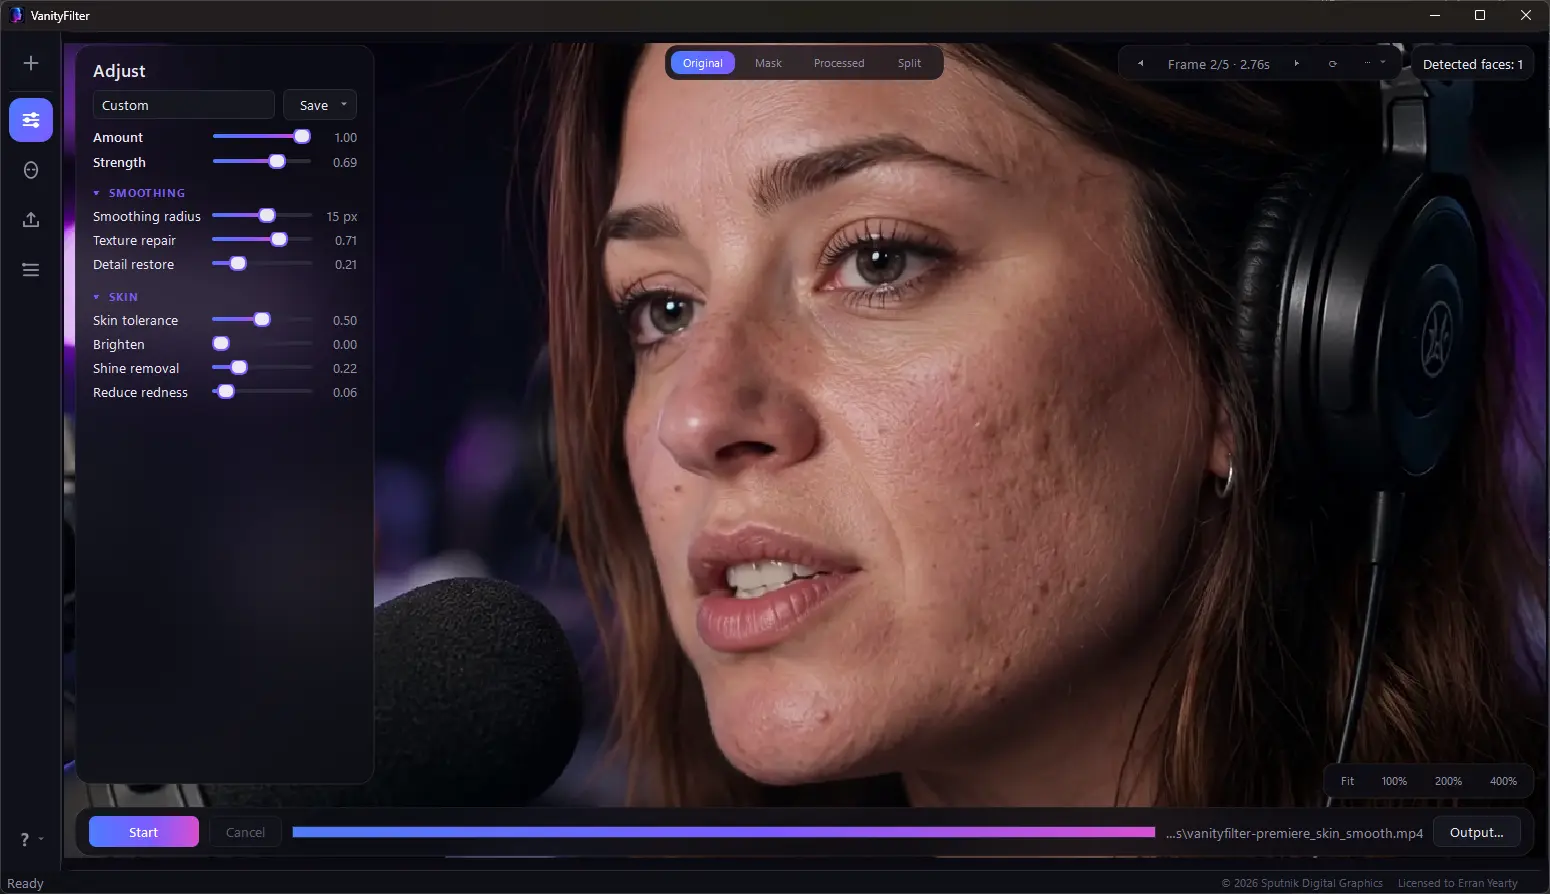
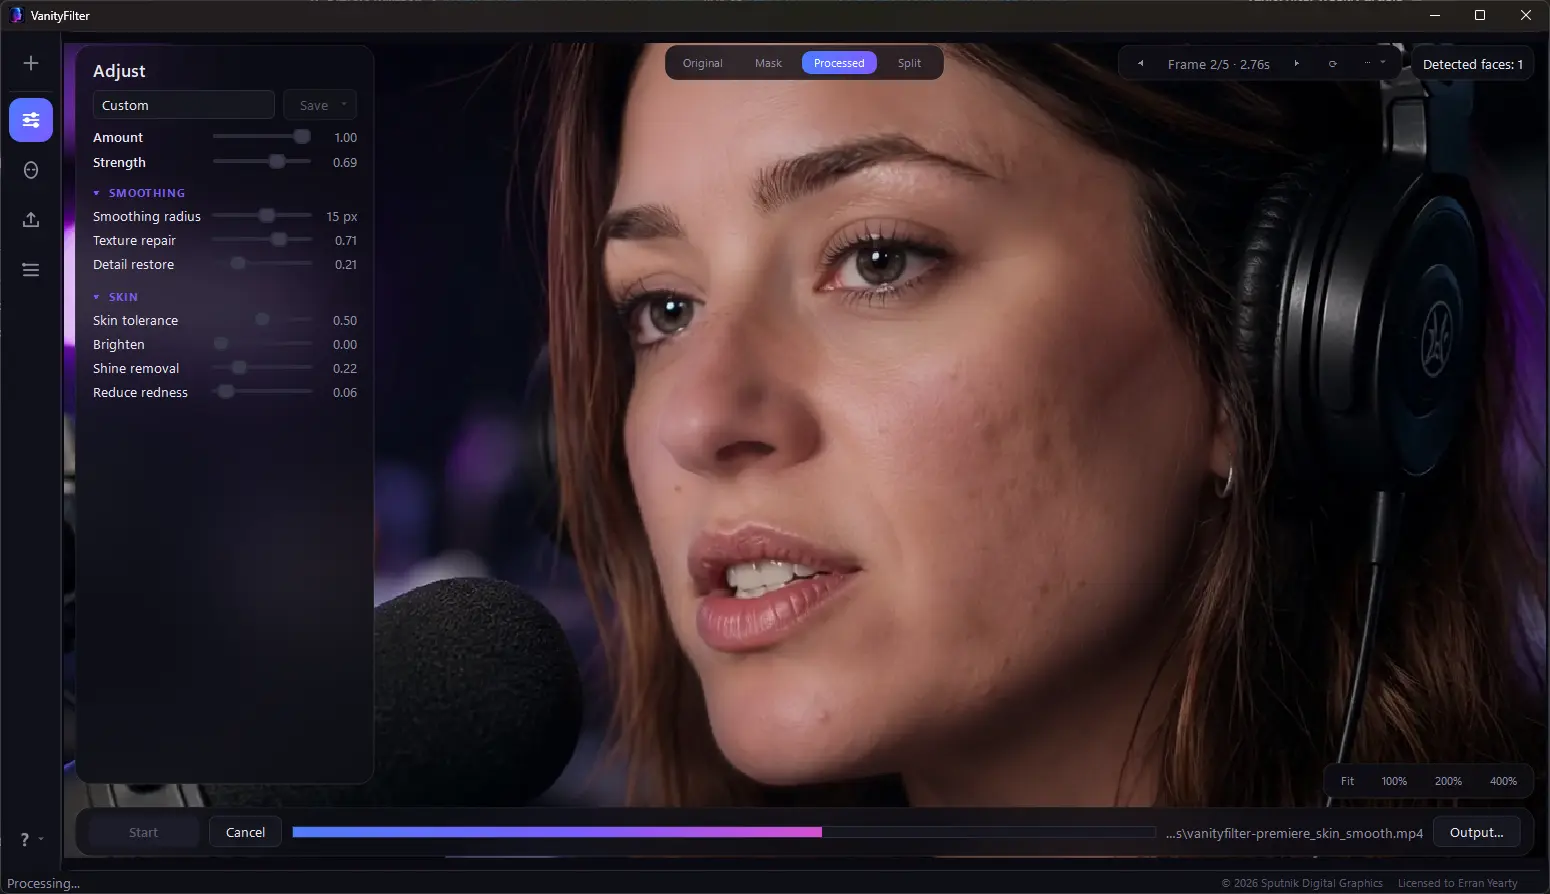
A real VanityFilter pass. The exported matte follows the same skin region used for this result, but leaves the final treatment open for the editor.
The short version: enable Export mask video before processing. VanityFilter writes a silent grayscale clip next to the main output. In Premiere, use that clip as a Matte Luma source for Track Matte Key. In Resolve, attach it as an External Matte and feed its key into the node holding your skin correction. Keep the source and matte aligned from the same first frame.
What the grayscale video means
A matte is control data you can see. White says apply the adjustment here. Black says leave this pixel alone. Gray creates partial influence, which is how a soft jawline or hairline edge blends without looking cut out.
Adobe’s current Premiere keying documentation describes the same rule for Track Matte Key: white areas are opaque, black areas are transparent, and gray areas are partially transparent. Because the source can be video, the matte can move over time.
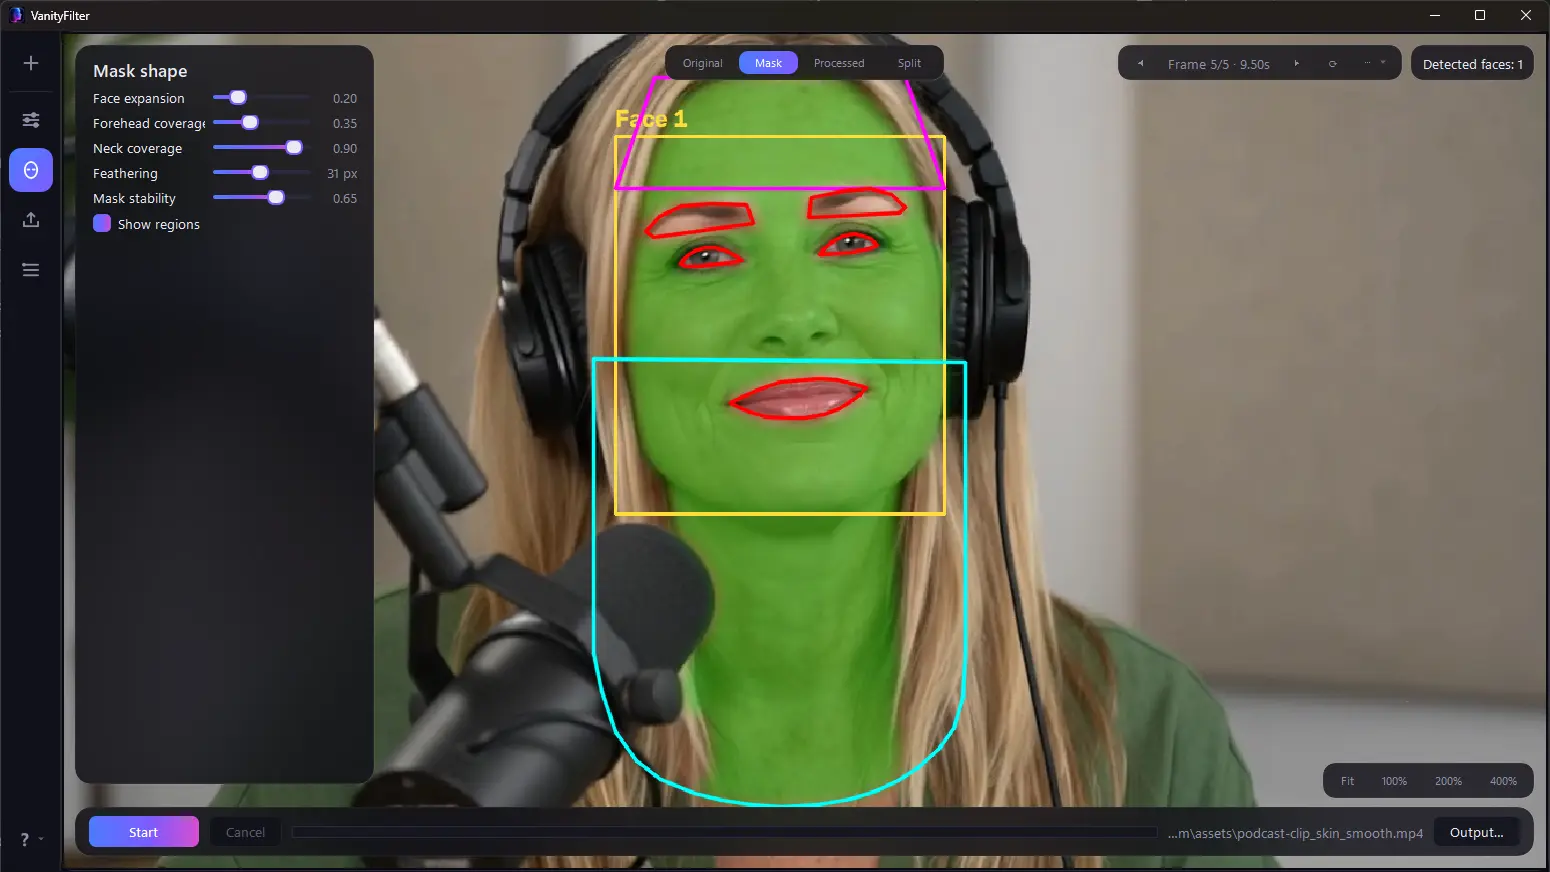
This is the useful split in the workflow. VanityFilter does the tedious part: finding faces, excluding eyes and hair, then following the skin through the clip. Your NLE gets the moving selection and you decide what it controls.
What VanityFilter writes
Check Export mask video in the Export panel before starting the job. If the processed file is
named interview_skin_smooth.mp4, the matte is written beside it as
interview_skin_smooth_mask.mp4. A ProRes output uses the same naming pattern with .mov.
The files stay matched
- The matte uses the source width, height, and frame rate.
- It uses the same selected H.264 or ProRes export family as the processed video.
- It has no audio track. The original audio remains with the processed master.
- The optional settings JSON records the output path, matte path, codec, and render settings.
- The free three-day trial cannot export a matte. The checkbox is disabled in trial mode.
Those details come from the current VanityFilter 2.1 exporter, not a guessed interchange recipe. The main output and matte are written from the same frame loop, which is why they line up until an editor trims or retimes one of them independently.
Premiere Pro: the three-track setup
Premiere needs two copies of the picture plus the matte. The bottom copy stays untouched. The upper copy holds the skin adjustment. The grayscale video decides where that upper copy can show through.
- Put the original footage on V1.
- Duplicate it directly above on V2. Apply the color, blur, texture, or glow adjustment to this copy.
- Put the matching VanityFilter mask video on V3, aligned to the same first frame.
- Apply Track Matte Key to the adjusted clip on V2.
- In Effect Controls, choose Video 3 as the matte and set Composite Using to Matte Luma.
- Hide the V3 matte track after the key is working. Do not disable the track if doing so breaks the effect in your Premiere version.
Adobe’s official Track Matte Key tutorial documents this three-track layout and the Matte Luma setting for an opaque black-and-white source.
Now the V2 effect appears only where the matte is bright. The untouched V1 picture fills everything else. If the wrong side changes, use the Reverse option rather than rebuilding the stack.
Good uses for the Premiere matte
| Adjustment on V2 | Why the matte helps |
|---|---|
| Small exposure lift | Brightens faces without lifting the wall or wardrobe |
| Warmth or tint correction | Keeps the grade on skin instead of every similar color in the frame |
| Restrained texture effect | Protects eyes, hair, lips, and the background from softening |
| Highlight control | Lets you shape a local correction for a shiny forehead or cheek |
If you want the full smoothing already rendered, use the clean processed output and skip this stack. The matte is for editors who want to change the treatment later. Our Premiere Pro skin-smoothing guide compares the rendered and timeline-based routes.
DaVinci Resolve: use an External Matte
Resolve calls this an External Matte. Blackmagic’s official training materials cover traveling mattes, and its documented Color page workflow lets you bring a clip from the Media Pool into the Node Editor as an External Matte. That matte can drive a secondary correction or a composite.
- Import the original footage and its matching VanityFilter matte into the Media Pool.
- Attach the matte to the source clip as an External Matte. Depending on the Resolve version, this may appear as Add as Matte or as a drag from the Color page Media Pool into the Node Editor.
- Create a serial node for the skin adjustment. Keep the primary balance in an earlier node.
- Connect the External Matte key output to the blue key input of the skin-adjustment node.
- Turn on Highlight mode and confirm that the face is selected while eyes, hair, and the background remain out.
- Make the adjustment, then review a head turn and any frames where a hand crosses the face.
The exact menu wording can move between Resolve releases. The node logic does not: the external grayscale clip supplies a moving key, and the node receives that key before applying its correction. Blackmagic’s current Resolve training page lists traveling mattes in its visual-effects training and mask-driven work in its Color lessons.
This route is especially useful when the skin work needs to sit inside a larger node tree. You can balance first, apply the skin-only node, then keep the look grade separate. The broader comparison in DaVinci Resolve versus VanityFilter explains when a rendered pass is faster than keeping the correction live.
Why mattes drift or look wrong
The source and matte start on different frames. Zoom into the timeline and align their first frames. A one-frame offset is obvious around a moving jaw.
Only one clip was retimed. Speed changes, freeze frames, reverse playback, and optical-flow work must affect the picture and matte together. Nest or compound them before retiming if that keeps the pair locked.
The matte is being read as alpha instead of luma. VanityFilter exports visible grayscale pixels, not an embedded transparency channel. Choose Matte Luma in Premiere. In Resolve, use the matte’s luminance as the key.
The correction is too strong at the edge. A good matte can still reveal a bad grade. If the face is two stops brighter than the neck, the mask boundary will show. Lower the adjustment before blaming the edge.
The matte was resized separately. Keep its dimensions and transform identical to the source. If you crop or reposition the picture, apply the same operation to the matte or combine them first.
When the matte is worth the extra tracks
Use it when the automatic selection saves real work but the final look needs human judgment. Commercial close-ups, mixed lighting, and a grade that is still changing are good candidates. It also gives another editor a clean handoff: picture, moving skin selection, and settings record.
Skip it when the rendered result is already right. Extra tracks are not a virtue. For a long talking-head batch, the finished skin-smoothed files may be the cleaner handoff, especially if the goal is simply to edit faster. That is the tradeoff behind the pre-edit workflow.
FAQ
What is a skin mask matte?
A skin mask matte is a grayscale video that tells an editor where an adjustment should appear. White represents the
skin area, black protects the rest of the frame, and gray creates partial influence at soft edges. The matte moves with
the subject, so it can drive a correction without drawing and tracking a new mask for every shot.
How do I use a grayscale skin matte in Premiere Pro?
Put the original on V1, a duplicate carrying the skin-only adjustment on V2, and the grayscale matte on V3. Apply Track
Matte Key to the V2 duplicate, choose Video 3 as the matte, and set Composite Using to Matte Luma. White reveals the
adjusted duplicate, black shows the untouched original, and gray blends the two at soft mask edges.
How do I use a skin matte in DaVinci Resolve?
Import the source and matching matte, then attach the matte to the source as an External Matte. On the Color page,
connect the matte’s key output to the key input of the node that contains the skin adjustment. Menu wording can
vary by Resolve version, but Blackmagic’s documented workflow treats the external clip as a moving key for a
secondary correction.
Why is my mask matte out of sync?
The matte and processed video must start on the same frame and keep the same speed. If one clip was trimmed, retimed,
interpreted at a different frame rate, or offset on the timeline, the mask will drift. Align both files at their first
frame, remove independent speed changes, and confirm that their resolution, frame rate, and duration match.
Does a VanityFilter mask matte include audio?
No. VanityFilter writes the mask as a silent grayscale video because it is control data, not a second program master.
It matches the source dimensions and frame rate and uses the same selected H.264 or ProRes export family as the main
output.
VanityFilter processes files offline on Windows. There is no subscription. See current pricing.