
Camtasia has no skin smoothing, beauty, or face retouch effect. You can stop scrolling the Visual Effects tab. Camtasia is a genuinely great screen recorder and course editor, and skin retouching is simply not in its job description. Here is what its controls actually do to a face, and the one workflow that fixes the problem without wrecking your tutorial.


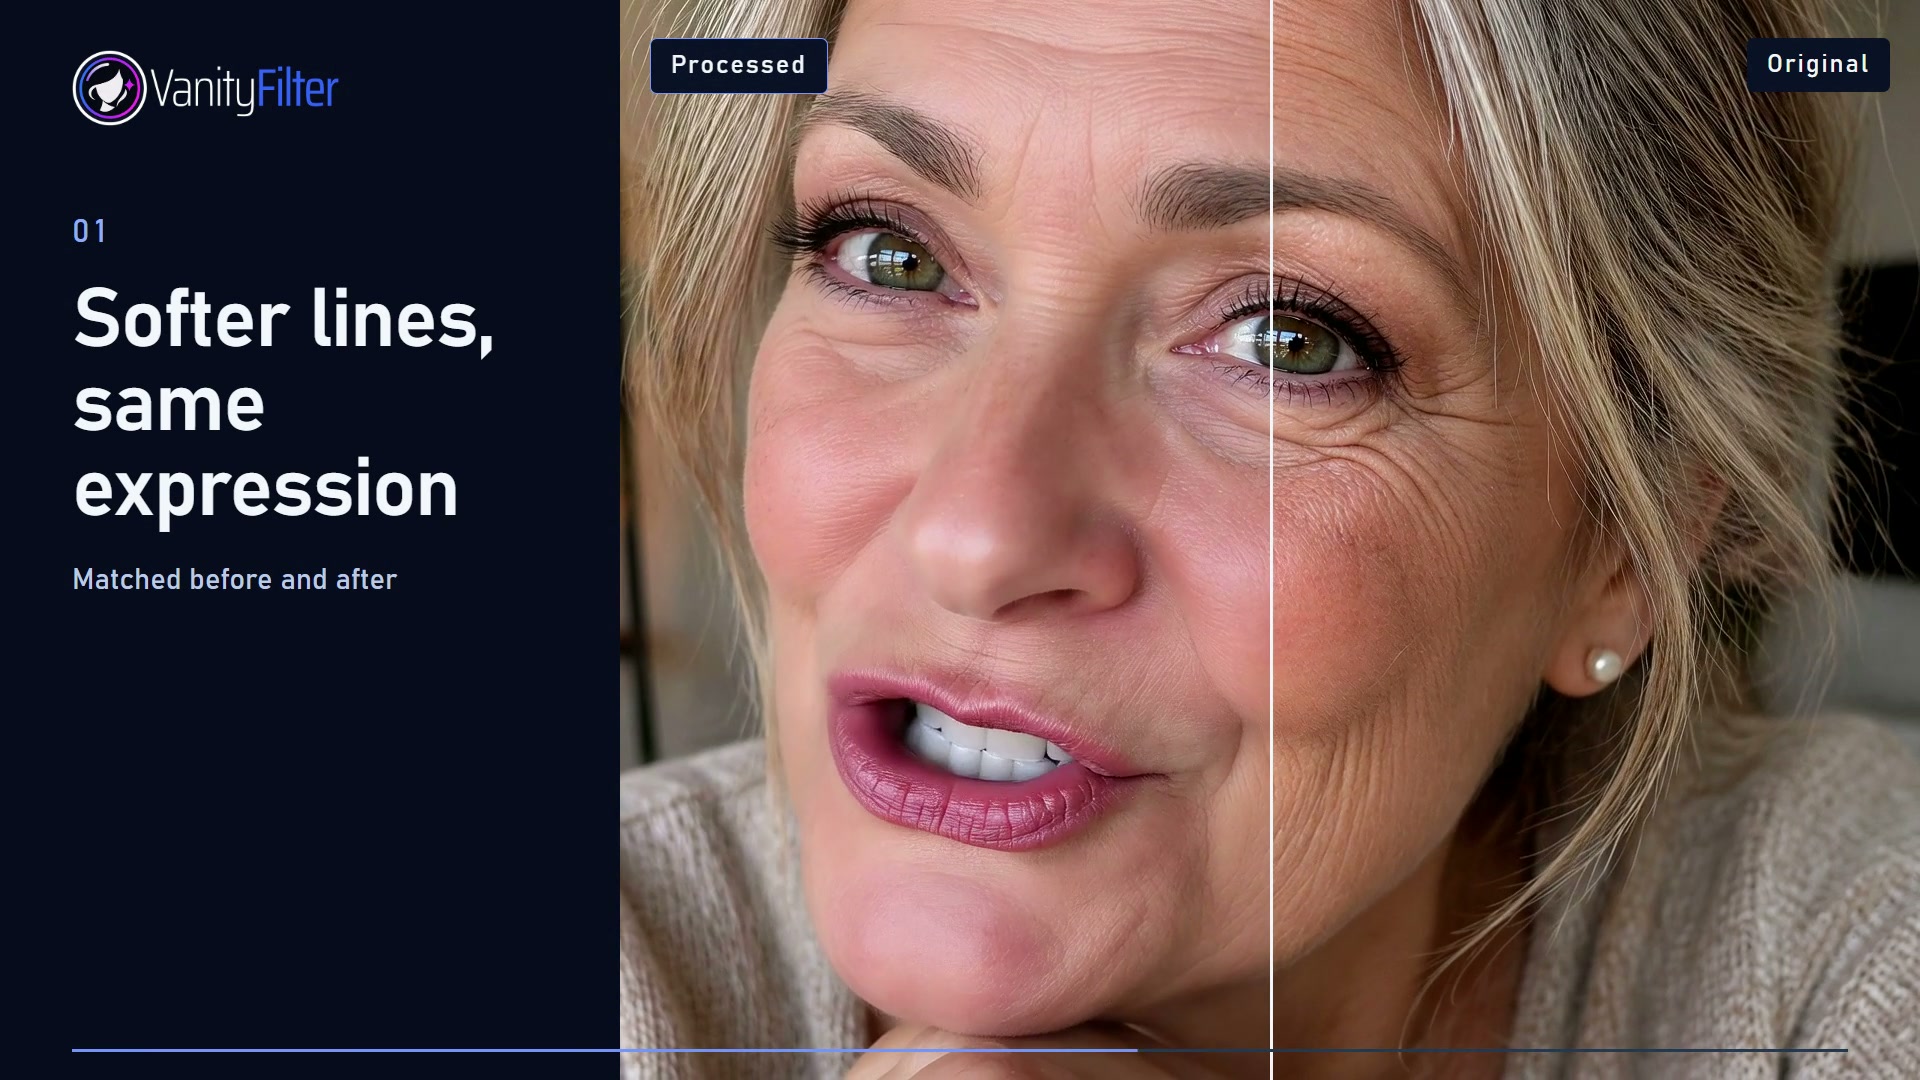
Drag to inspect cheek and forehead texture. The after frame is actual VanityFilter output.
The short version: nothing in Camtasia reads a face. Record your camera as its own file, run a skin-only pass on that file, then drop the corrected camera clip on the timeline and edit like normal. Your screen recording stays untouched, and Camtasia’s produce step is still the only encode.
Why this comes up for Camtasia users specifically
Camtasia lets you record your screen and webcam at the same time, and it lands those as separate layers you can move around. That is the whole appeal for tutorials, course modules, and training videos. It is also exactly why skin becomes a thing.
Your camera track usually ends up as a small picture-in-picture bubble or a full-frame talking-head intro. Either way it is a webcam sensor, in a room, under whatever light you had. Webcams run heavy sharpening and noisy gain in imperfect light, so pores, redness, and shine get crunchy fast. Then you sit there recording take after take of a 30-minute module, and every one of them has the same face problem baked in. Nobody is reshooting a course module because of a shiny forehead.
What Camtasia actually gives you
Per TechSmith’s current Visual Effects tutorial, the effects list breaks into four groups:
- Color: Colorize, Color Adjustment, Color Filters, Color Tint, Glow, Remove a Color, Sepia.
- Graphic display: Background Removal, Blur Region, Border, Corner Rounding, CRT Monitor, Cursor Path Creator, Device Frame, Drop Shadow, Keystroke, Mask, Interactive Hotspot, Mosaic, Outline Edges, Reflection, Spotlight, Static Noise, Tiling, Torn Edge, Window Spotlight, Vignette.
- Motion: Clip Speed, Freeze Region, Motion Blur, Motion Path.
- Multi-track: Blend Mode, Media Matte.
Read that list again with a face in mind. Not one entry touches skin. The Filters are look and grade tools with adjustable brightness, contrast, and color intensity. A grade can absolutely make you look better lit. It cannot tell a cheek from a collar, so the texture it started with is the texture it ends with.
The near misses are worth naming, because they are the ones people try:
- Background Removal. Camtasia will cut you out of your room, which is genuinely clever. It works on the boundary between you and the wall behind you. It does nothing inside the face.
- Color Adjustment and Color Filters. Brightness, contrast, and color across the whole frame. Warmer skin, same pores.
- Glow. A bloom effect over the image. It softens the whole picture, including your eyes and your slides.
- Vignette and Spotlight. Darken edges or draw attention to a region. Composition, not skin.
- Mosaic. Pixelation. A privacy tool, and a rough one.
Blur Region is a privacy tool, not a retouch tool
Blur Region is the effect everyone reaches for, so it deserves a straight answer. TechSmith’s blur and mask tutorial describes it as an effect you drag onto the canvas, then size with shape handles into an oval or rectangle, with blur intensity, tint, opacity, and shape in the Properties panel. That is a tool for covering an email address in a demo, a customer name in a CRM, or a license plate. It is doing its job perfectly.
Point it at a face and two things break immediately. First, it is a solid shape with an even blur inside, so it blurs your eyes, brows, lashes, and lips right along with your cheeks. A talking-head video lives on the eyes and the mouth. Softening them to reach the skin is a bad trade at any strength. Second, the shape does not know a face is there. TechSmith’s own guidance for a moving target is to add a Custom animation and drag the blur to the object’s new position, which means you are hand-keyframing a rectangle to chase your own head. On a 30-minute module, in a picture-in-picture bubble you also scale and reposition, that is not a workflow. That is a punishment.
And even when you nail the keyframes, the edge of the blur cuts a visible seam across the face. Viewers clock it instantly. Doing nothing looks better than doing that.
The workflow that actually works
Skin work belongs to a tool that can find skin. That means a separate pass on the camera video, before or after the Camtasia edit. Two routes, and one of them is clearly better for Camtasia.
Route one, the good one: treat the camera file before you edit. Record your camera to its own file. Run the skin pass on that file. Import the corrected camera clip into Camtasia and build your module exactly the way you always do: screen track, camera track, callouts, cursor effects, transitions, produce. Camtasia’s produce step stays the single encode over already-corrected footage, and your screen recording is never re-encoded by a skin tool that has no business touching it. The pre-edit workflow guide covers why that ordering protects quality in every editor, not just this one.
Route two: treat the produced video. Your module is already cut and produced, and rebuilding the timeline is not happening. Produce from Camtasia, run the skin pass on that finished file, deliver the corrected version. It costs one more encode, which is a minor quality hit for most delivery targets but a real one. There is a second catch that matters more here: the pass now sees your whole frame, slides and screen capture included, not just the camera bubble. Face detection simply finds no face in the screen regions and leaves them alone, but you are spending processing time on pixels that did not need it. Use this route when the cut is locked, not as your default.
If you are also recording live to a streaming setup, the OBS comparison covers the different tradeoffs between smoothing at record time and smoothing in post.
Running the skin pass, in plain terms
The pass runs on Windows as a separate file step. It is not a Camtasia plugin, extension, or integration. It does not run in real time. You feed it video files and it writes new video files.
Check a frame where you are actually talking
VanityFilter’s preview browser samples frames across the video evenly, randomly, or at an exact timestamp. Inspect each sample as processed, mask overlay, original, and side by side. Pick a frame where you are mid-sentence and gesturing, not a still moment at the top of the take that flatters the settings.
The mask overlay is the check that matters. Smoothing has to stop where skin stops, leaving eyes, brows, lips, hair, glasses, and collars alone. If the mask creeps onto your hair or your headset, the smoothing will too, and it will be obvious at full size.
Keep the Master Amount low. It is a wet/dry dial across the whole effect. Start near the original and raise it only after the mask reads clean. This matters double for Camtasia work, because your camera bubble is often displayed small. A setting that looks subtle at full screen can look like a wax figure once the bubble is scaled down and sharpened by the viewer’s player.
Export at the source dimensions. If the camera recorded 1080p, export 1080p. Upscaling in the skin pass adds nothing, and downscaling throws away detail you might want when you scale or crop the camera track in Camtasia.
Honest limits
The limits are published rather than buried. Variable-frame-rate footage exports as constant frame rate, which is worth knowing if your webcam records VFR. Very small or heavily covered faces are skipped for those frames, and the mask fades out smoothly instead of flickering. That is relevant if your camera bubble is tiny in frame for long stretches: below a certain size there is not enough face to work with, and the honest answer is to record the camera at a decent resolution even when you plan to display it small.
Up to five faces are detected per frame, which covers a co-hosted module or an interview segment. For a solo tutorial the count is one. If you are weighing this against other options on Windows, the Windows software comparison lays out what each approach really does to a face.
Where VanityFilter fits
VanityFilter is a separate offline Windows application. It takes MP4, MOV, AVI, or MKV and writes GPU H.264 with AAC audio or ProRes 422 HQ with PCM audio. Original audio is preserved. It runs on Windows 10 or 11 64-bit, with an optional NVIDIA GPU, and it works offline, so training footage with internal screens in it never leaves the machine. For a lot of corporate and education users, that last part is the whole decision.
Position it narrowly. It is the skin pass Camtasia does not have. It is not a Camtasia replacement. You still record, cut, annotate, and produce there. VanityFilter handles the one job Camtasia was never built to do.
Which route fits your situation
You have not recorded yet. Record the camera to its own file so you can treat it independently. Light your face evenly, which gives the mask clean edges to work with, and keep hair off your forehead where you can. Record the camera larger than you plan to display it. Then run the source-file route.
The recording exists and the Camtasia edit has not started. Run the source-file route now. Treat the camera file, import the corrected version, and build the module normally. Cleanest result, single encode, no screen pixels touched.
The module is already produced. Run the produced-file route and accept the extra encode. Right call when the timeline is locked and the deadline is today.
FAQ
Does Camtasia have a skin smoothing or beauty filter?
No. Camtasia’s Visual Effects and Filters cover color, graphic display, motion, and multi-track jobs. There is no skin, beauty, face, portrait, or blemish effect in the list.
Can I use Blur Region to soften my face in Camtasia?
It is the wrong tool. Blur Region covers an oval or rectangle with an even blur, so it hides eyes and brows along with skin. It is built to conceal private information, not to retouch a face.
Does Camtasia’s blur follow a moving face automatically?
No. TechSmith’s own tutorial has you add a Custom animation and drag the blur to the object’s new position by hand. There is no automatic face tracking, so a presenter who leans or turns walks out from under the blur.
What is the best way to smooth skin in a Camtasia project?
Record the camera as its own file, run a separate offline skin pass on that file, then bring the corrected camera clip into Camtasia. Your screen track is never touched and Camtasia’s produce step stays the only encode.
Does VanityFilter run inside Camtasia as a plugin?
No. VanityFilter is a separate offline Windows application that reads video files and writes corrected video files. You import those files into Camtasia. It does not install into Camtasia and does not modify a Camtasia project.
VanityFilter processes video offline on Windows. There is no subscription. See current pricing.