
A 4K camera is rude in a very specific way. It records enough detail to show the dry patch beside your nose, the ring-light reflection on your forehead, and the edge where foundation stopped. The answer is not to blur the whole frame. Build a cleaner capture, correct the actual problem, then leave real skin in the shot.
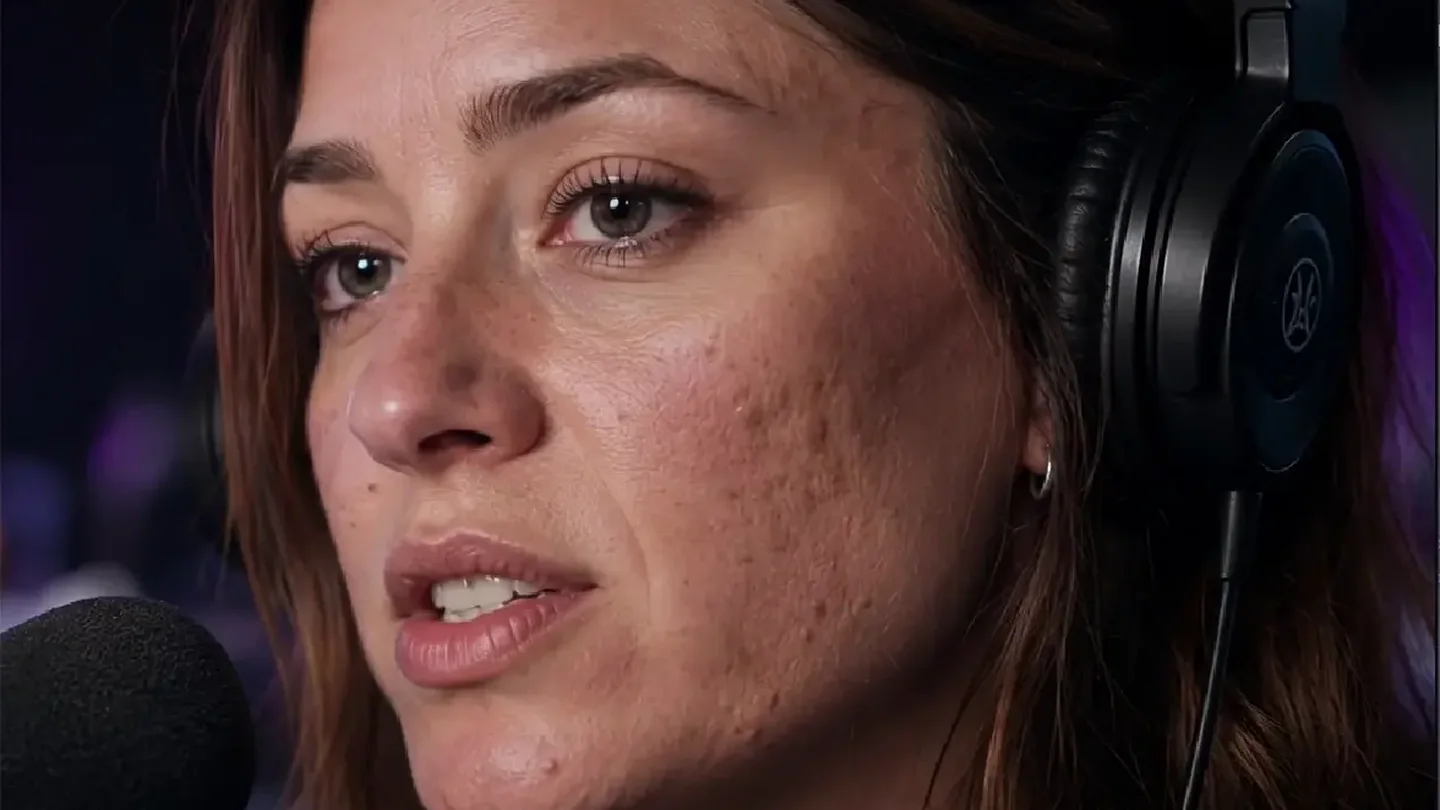
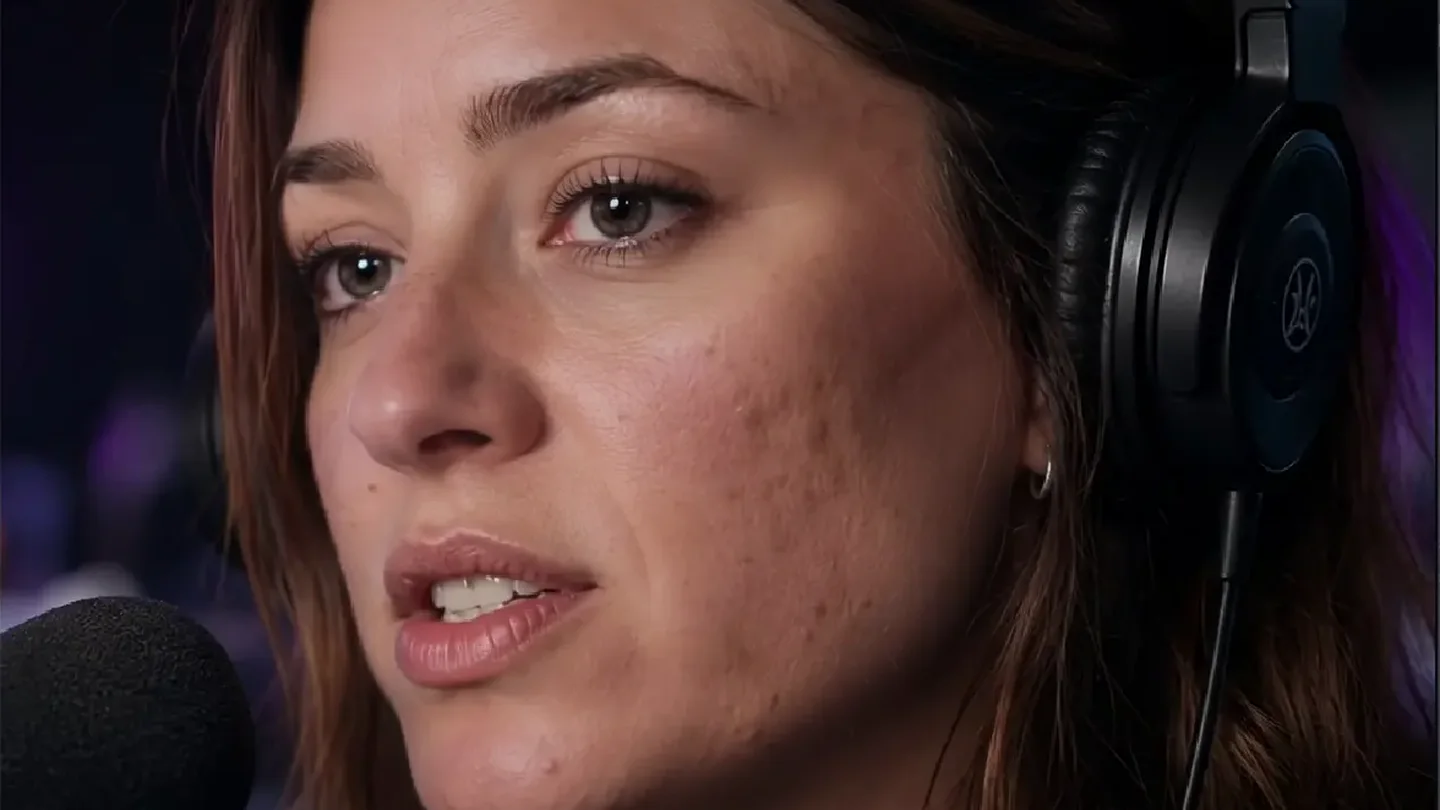
A close crop from real VanityFilter footage. The right side is an editorial 60 percent mix of the processed frame, blended back toward the original to show the restraint a high-detail shot needs. The source is not presented as a native 4K resolution test.
The short version: use soft, controlled light slightly above eye level. Lock exposure and white balance. Turn down any excessive in-camera sharpening. If skin still pulls attention, correct shine or redness before adding a low-strength, skin-only smoothing pass. Review motion at normal size, then inspect one difficult frame at 100 percent. Keep the final export at 3840 by 2160.
4K does not make skin worse
It makes the inspection harsher. A 3840 by 2160 frame contains 8,294,400 pixels. A 1920 by 1080 frame contains 2,073,600. That is four times the pixel count before the viewer zooms in or watches on a large screen. YouTube’s current 4K creation guide describes the same resolution and recommends recording and exporting at 3840 by 2160 when 4K is the intended format.
More pixels are useful. Eyes stay crisp. Hair reads better. A product or microphone holds detail. The downside is that rough light and broad corrections are easier to catch. A forehead hot spot may cover hundreds more pixels. A mask that slips over an eyebrow has nowhere to hide.
| What bothers you in the 4K frame | Fix this first |
|---|---|
| Every pore looks deep and hard | Move a larger, diffused key light closer and reduce aggressive sharpening |
| Forehead or cheeks look oily | Change the light angle, blot on set, then use local shine control if needed |
| Face looks red while the room looks right | Use a skin-only chroma correction, not a global white-balance move |
| Skin looks plastic after retouching | Lower the wet/dry amount and restore detail before adding sharpness |
| Only the uploaded copy looks rough | Check the local master and wait for the 4K encode before changing the grade |
Start with light that does not carve every bump
A small, direct light creates hard transitions. Those transitions make texture read as little peaks and valleys. The practical fix is a larger diffused source placed close enough to wrap around the face, usually a little above eye level and off to one side. You still want shape. You do not need a bright point source aimed straight at the forehead.
Nikon’s official guide to shooting interview video recommends soft light from slightly in front and above the eye line. That advice matters more in 4K because lighting texture gets recorded with the same extra detail as the face.
Turn off overhead room lights for the test. They often add a second direction, dark eye sockets, and a bright strip across the forehead. Set the key first. Add a weaker fill only if the shadow side becomes distracting. Then lock white balance so the camera does not repaint skin color during a take.
Be careful with in-camera beauty settings
Some creator cameras offer a face-aware soft skin effect. It is fast and can look fine at a low setting, but the treatment is baked into the file. You cannot recover the untouched texture later.
Preview behavior may also be misleading. Sony’s current ZV-1F Soft Skin Effect guide says the effect is unavailable in several 4K configurations. It also says a 4K movie may record the effect even when the camera monitor does not display it during shooting. That is a camera-specific warning, not a rule for every Sony body. Check the manual for your exact model and recording mode.
Run a ten-second camera test
- Record one clip with the camera beauty setting off.
- Record the same movement at the lowest available setting.
- Copy both files to the computer. Do not judge from the flip screen.
- Check a smile, a head turn, the hairline, and one hand crossing the face.
If you cannot tell which clip is treated at normal viewing size, leave the effect off and keep the clean master. That gives you room to decide later.
Correct the problem in the right order
First, fix the overall cast. If the face, shirt, and wall all lean green, that is a white-balance or grading problem. A skin filter should not compensate for the entire scene.
Next, deal with local color and highlights. A red cheek does not require heavier smoothing. A ring-light hot spot does not require flattening every pore. Our guide to reducing face shine in video separates lighting fixes from local highlight correction. The even skin tone guide does the same for redness and blotchy color.
Only then smooth texture. Start low. Increase the treatment until the distraction stops pulling your eye, then back it down slightly. Watch the face move. A still frame can hide a mask that chatters at the jawline or grabs hair during a turn.
Finish with detail, not global sharpness. Restore enough fine texture to keep pores and facial hair alive. Global sharpening is a poor rescue because it also sharpens makeup edges, compression noise, and the wall behind the subject.
Judge the result at two sizes
At normal viewing size, ask whether the face looks believable and whether anything is distracting. This is the audience test. Most viewers are not pausing on one cheek at 400 percent.
At 100 percent, look for technical failures: smeared eyelashes, a halo at the jaw, plastic areas with no texture, or untouched patches that jump as the head moves. This is quality control, not the target aesthetic.
Then play the clip. Motion is the final judge. Skin detail should remain stable while the correction follows the person. If one frame looks perfect and the next looks different, lower the effect or fix the mask before exporting.
Keep the 4K frame through processing
A high-resolution workflow can use proxies for editing, but the final treatment should be calculated from the full source frames. VanityFilter 2.1 reads the source width, height, and frame rate, then writes those same values to the H.264 or ProRes output. A 3840 by 2160 input remains 3840 by 2160. Source audio is carried into the finished file.
The preview is allowed to be lighter than the export. That is normal. What matters is that the processed master keeps the original frame dimensions rather than quietly becoming 1080p.
Export 4K for YouTube without undoing the work
YouTube’s current upload encoding guidance calls for H.264, progressive scan, 4:2:0 chroma subsampling, and the same frame rate used for recording. For SDR 2160p, it recommends 35 to 45 Mbps at 24, 25, or 30 fps. The recommendation rises to 53 to 68 Mbps at 48, 50, or 60 fps.
Upload a short unlisted test before committing a long episode. Wait until 2160p is available, then check a head turn, fine hair, and the brightest patch of skin. The local master and uploaded encode answer different questions. Our YouTube compression guide explains how to tell them apart.
FAQ
Why do I look worse on a 4K camera?
A 4K frame records 3840 by 2160 pixels, four times the pixel count of 1080p. Texture, shine, makeup edges, focus errors,
and harsh lighting can therefore be easier to see. The camera has not made your skin worse. It has removed some of the
softness that previously hid those details.
Should I use my camera’s soft skin effect in 4K?
Use it only if you are comfortable baking the effect into the recording. Availability and preview behavior vary by
camera and recording mode. Sony’s ZV-1F manual, for example, says its Soft Skin Effect may be unavailable in some 4K
setups and may affect the recorded image even when the monitor preview does not show it.
How much skin smoothing should I use for 4K video?
Use the lowest amount that fixes the distraction in motion. Check the result at normal viewing size and at 100 percent.
Pores and fine facial detail should remain, while isolated roughness, redness, or distracting shine becomes less obvious.
There is no universal percentage because lighting, distance, lens sharpness, and the subject all change the answer.
Can VanityFilter keep a video at 3840 by 2160?
Yes. VanityFilter’s current 2.1 export pipeline writes the input width, height, and frame rate to the output, so a
3840 by 2160 source remains 3840 by 2160. It can export H.264 MP4 or ProRes 422 HQ MOV with the source audio.
What bitrate should I use for 4K YouTube video?
YouTube currently recommends 35 to 45 Mbps for SDR 2160p uploads at 24, 25, or 30 frames per second, and 53 to 68 Mbps
at 48, 50, or 60 frames per second. Its guidance also calls for the recorded frame rate, progressive scan, H.264, and
4:2:0 chroma subsampling.
VanityFilter processes files offline on Windows. There is no subscription. See current pricing.