
Solo talking-head advice falls apart the moment a guest sits down next to you. Now there are two skin tones, two lighting positions, sometimes two cameras, and a ninety-minute runtime instead of a ninety-second take. The fix that works for one hero shot (draw a mask, track it, move on) turns into homework you will quietly stop doing by episode four.
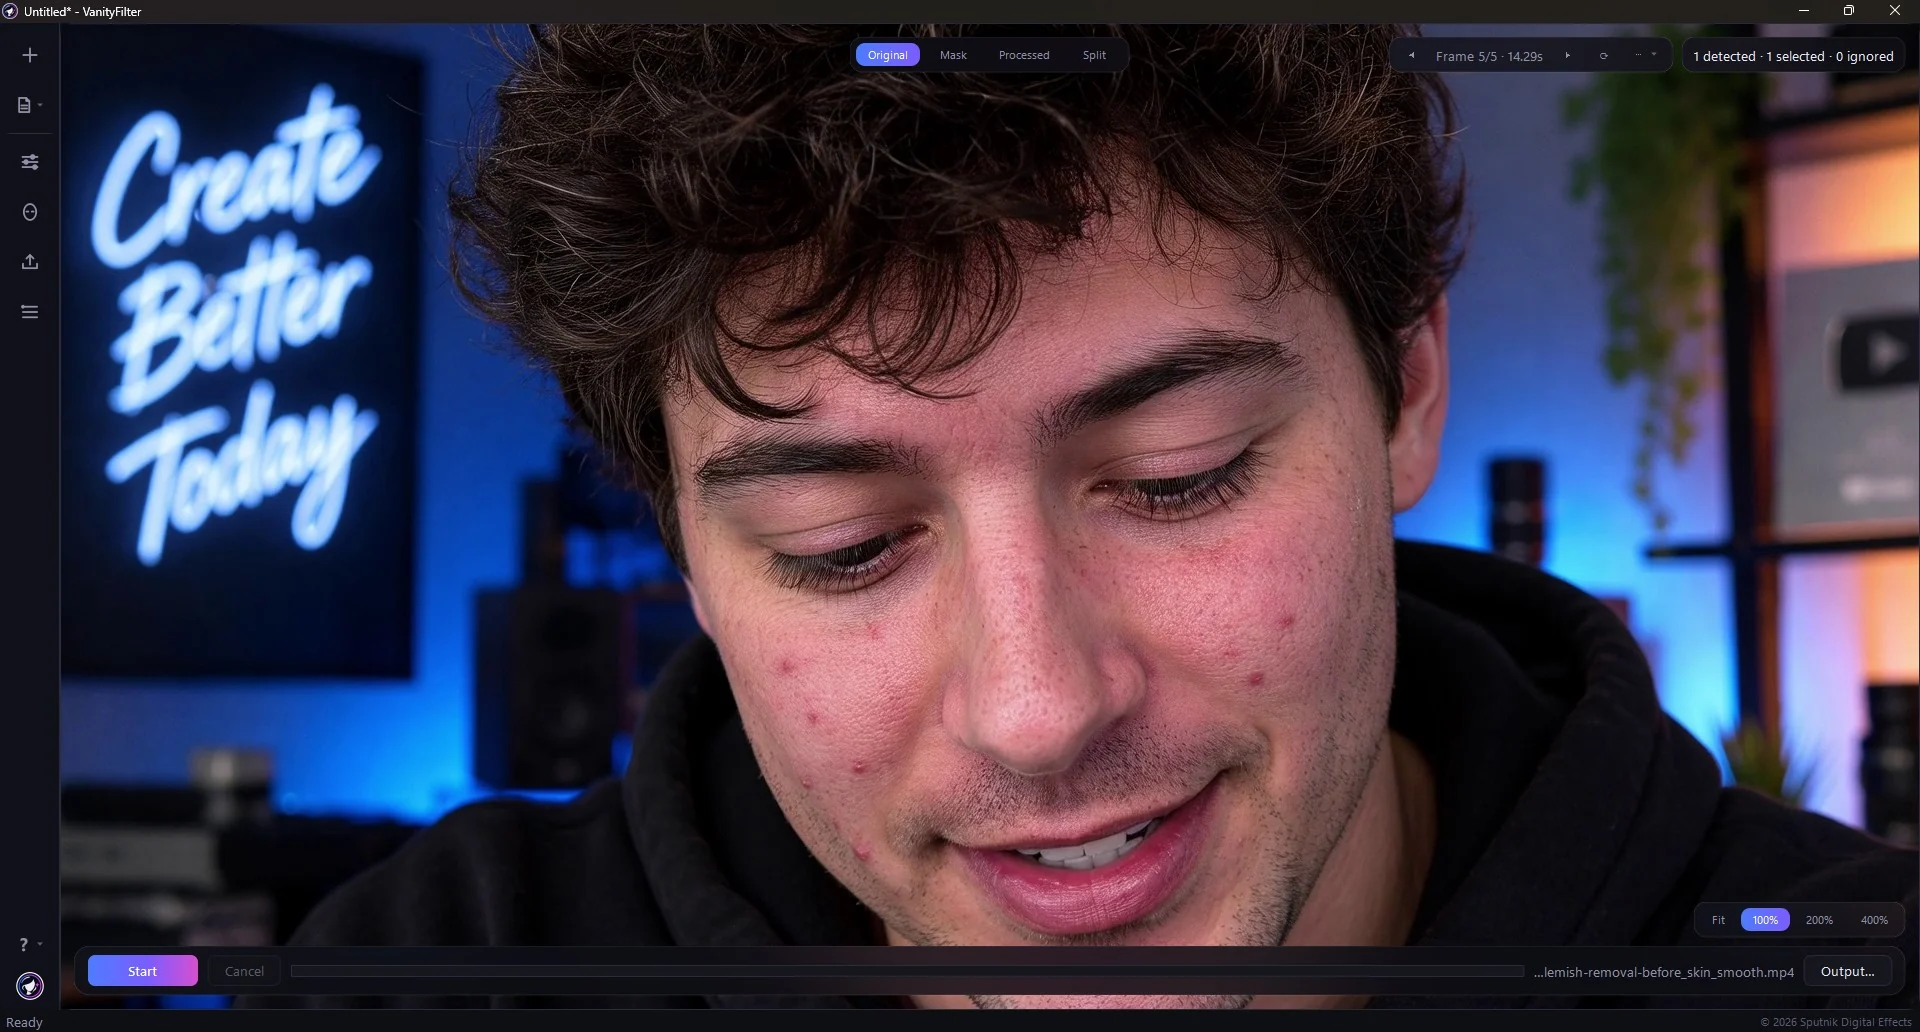
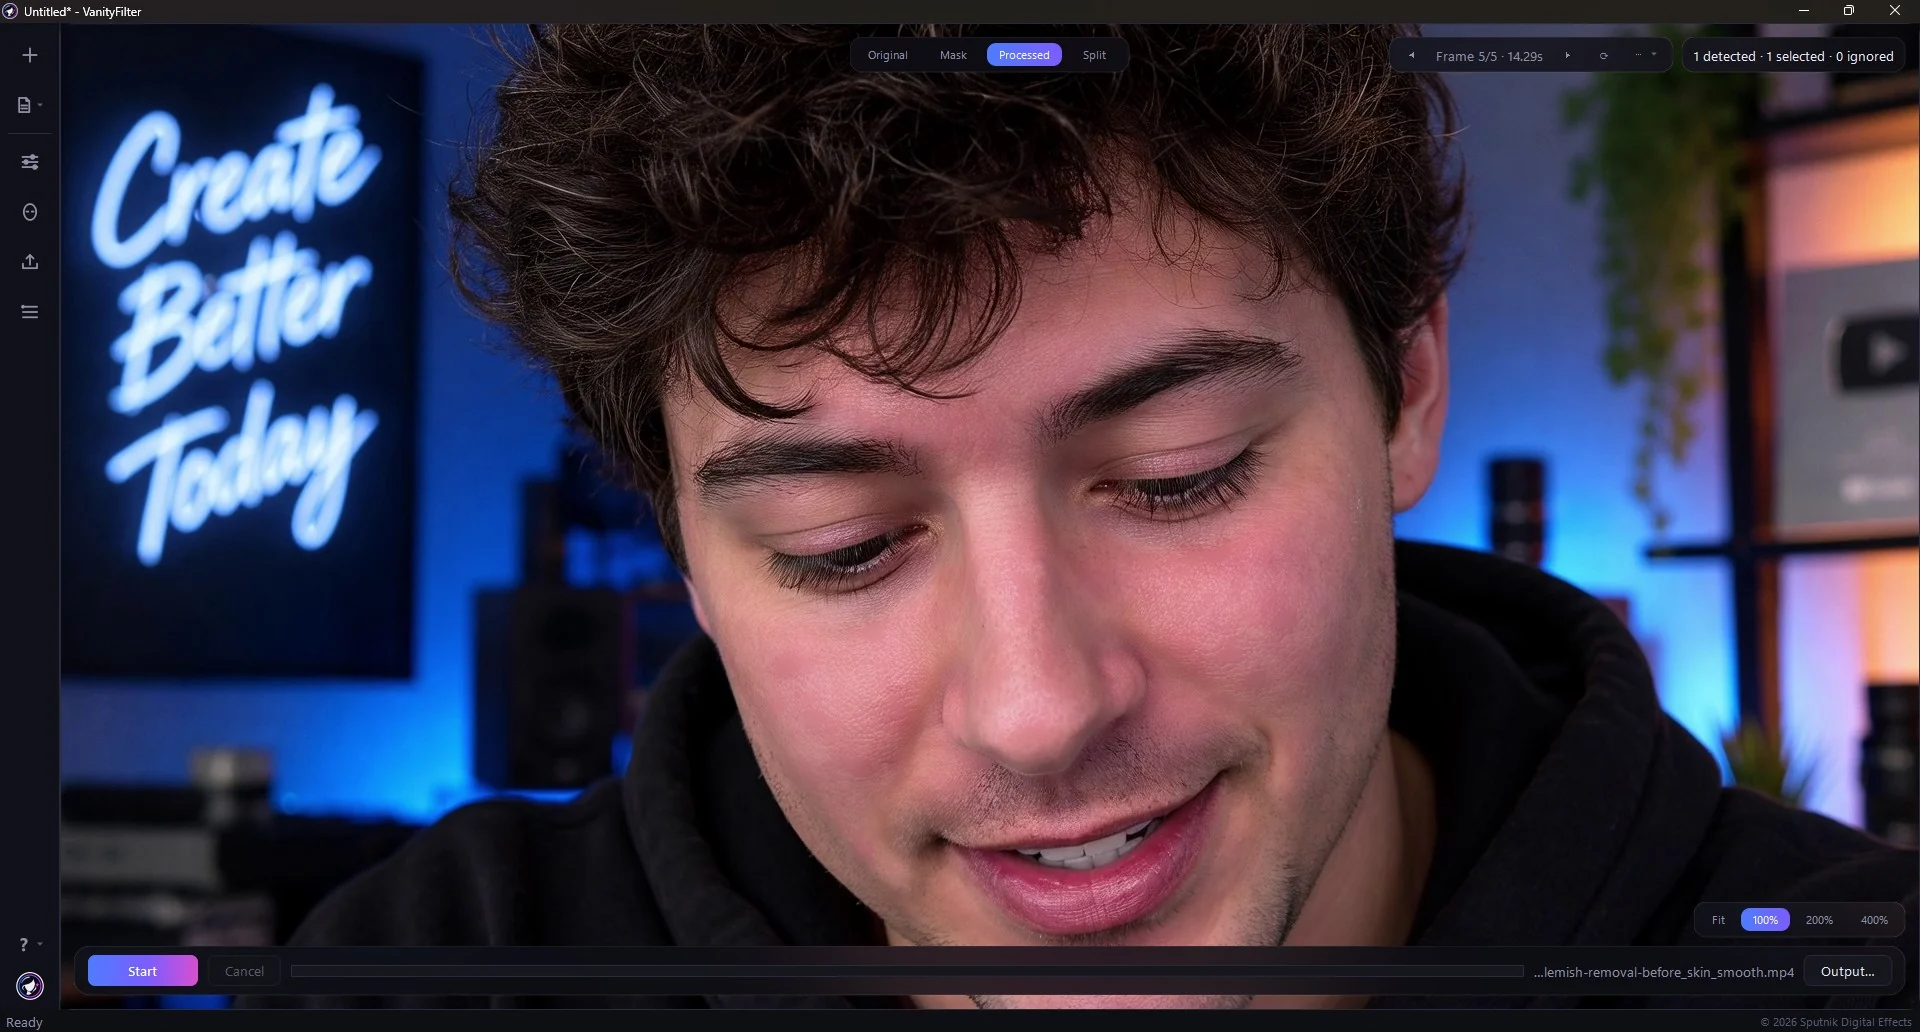
Real footage in VanityFilter 3.1.5, same frame, Original against Processed. Nothing here is generated. Watch the hair, the lashes and the lit room behind: the mask stops at skin.
The short version: if the stream is the final product, a real-time filter is fine. If the recording becomes a YouTube episode, do the skin work in post, do it per person, and do it on the raw files before you cut. Correcting a two-hour edit clip by clip is the part nobody sustains.
Why podcast and stream footage is its own problem
Four things change once you go from solo to a table with guests.
Two skin tones, one setting. Whatever amount of smoothing looks right on the host in the key light is usually too much for the guest sitting slightly in shadow, or vice versa. A single global adjustment cannot flatter both. It just picks a winner.
Nobody controls the guest. You lit your side. Your guest brought their own webcam, their own lamp, and whatever their room's white balance is doing. Remote episodes make this worse, not better.
Runtime. A ninety-minute conversation cut into two hundred timeline clips means any per-clip effect gets applied, tracked, or verified two hundred times. That is the real cost, not the effect itself.
Faces move constantly. People lean back, laugh, turn to each other, drink coffee, and disappear behind a mic. A tracked mask that behaves for a scripted ten-second read will drift over an unscripted hour.
Real-time beauty filters versus fixing it in post
The tools ranking for "OBS beauty filter" are real-time webcam processors. Streamfog says its OBS beauty filter can run as a virtual camera or browser source in OBS and Streamlabs. Some webcams offer their own beauty mode too. OBSBOT says the Tiny 2 Beauty Mode smooths skin and brightens eyes before the feed reaches the streaming app.
These are genuinely good for live work. They are also permanent. Whatever the filter decided during a fast head turn is now baked into your recording, and you cannot turn it down in the edit. That is a fair trade for a Twitch stream that lives and dies in the moment. It is a bad trade for a podcast episode that becomes a YouTube upload, forty vertical clips, and a thumbnail.
Pick by deliverable, not by preference
Live is the product: use a real-time filter, keep it light, and stop thinking about it.
The recording is the product: record clean, retouch after. You keep the ability to change your mind, and you keep an unprocessed master for the day a clip goes big and someone re-cuts it.
Both: stream with the filter off or very low, then do the real pass on the recording. A watered down live look plus a proper post pass beats stacking two corrections on top of each other.
Use your separate participant tracks
This is the part most workflows leave on the table. Riverside and StreamYard can record isolated local audio and video for each participant, not only the mixed program feed. Riverside documents separate participant tracks at up to 4K. StreamYard’s local recording documentation says it creates an individual video file and an individual audio file for each host and guest when local recording is enabled before the session. If you record locally in OBS, the same idea applies when each camera writes its own file.
Isolated tracks mean each person is already their own file, which makes per-person correction trivial instead of clever. Give the host one set of values and the guest another, process both, then bring the corrected files into your edit. No masks, no tracking, no per-clip effect stack.
- Download the per-participant video files, not only the mixed program export.
- Pull one representative frame from each: mid-conversation, normal expression, normal lighting.
- Dial settings per person against that frame until skin looks even and pores are still visible.
- Batch the full-length files with those settings and let it run while you do something else.
- Edit the corrected exports. Every cut inherits the correction automatically.
If you only have the mixed program file, you are back to needing a tool that separates the two faces inside one frame. That is the next section.
Where the timeline route stalls
Doing it inside the NLE works, and for a single hero shot it is the right call. It scales badly for exactly the reasons above.
Blackmagic Design describes Face Refinement as a Studio effect that detects a face, builds masks for facial areas, and tracks them after you add the effect to a node. For independent control over two hosts, use separate face-specific setups so each person gets different settings. That setup still rides along on every angle and every cut. We broke down the tradeoffs in Resolve Face Refinement versus VanityFilter.
In Premiere, the built-in method is a duplicated clip, a blur, and a feathered mask you track by hand. It is reliable and it is free. It is also per-clip, per-person, per-cut, which is fine for a monologue and grim for episode twelve.
Adjustment layers feel like the shortcut here and usually are not. An adjustment layer applies the same correction to both faces plus the wall, the mic, the plant, and the guest's sweater. You end up masking anyway.
The pre-edit pass
The alternative is to treat skin correction as an ingest step. Run the raw files through a dedicated pass, then edit clean plates. Smooth Skin Before You Edit covers the full argument, and the short version is that you do the work once instead of once per clip.
VanityFilter is a Windows desktop app built for that job. It detects up to five faces in a frame, including profile views, and builds an independent skin mask for every person, so a two-host or three-guest table gets per-person treatment out of one pass. The mask stays on skin: eyes, lips, eyebrows, hair, facial hair, glasses, clothing, and background are excluded.
The practical bits for long-form:
- Batch a folder of episode files and walk away. There is a CLI when you want it scripted.
- Export H.264 for a fast turnaround, ProRes 422 HQ when the file is going back into a real edit.
- Export a grayscale mask matte if you would rather finish the correction inside Premiere or Resolve.
- Shine removal and redness reduction sit beside the texture controls, so a hot forehead and a flushed cheek are separate decisions instead of one blur turned up.
- Everything processes locally on your machine. Guest footage does not get uploaded to anyone's server, which matters more than people admit when the guest has not signed anything about it.
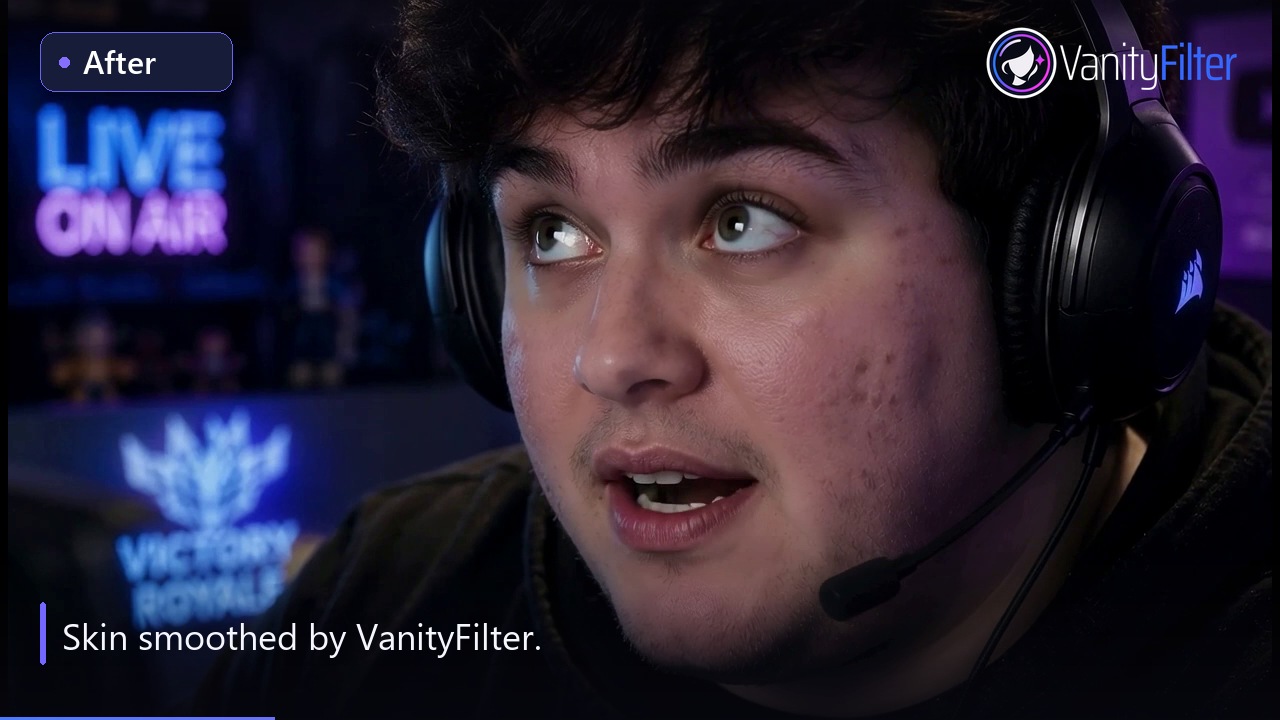
Before and after, in motion.
Compare the same recorded clip before and after processing, with synchronized switches.
Settings that hold up over a full episode
Long-form is unforgiving in a way a thirty-second reel is not. Your audience watches the same face for an hour, so anything slightly off has time to become obvious.
Start lower than feels right. A correction that looks too subtle while you are zoomed to 300 percent studying pores is usually correct at normal viewing size. Judge on the timeline at fit-to-window, then spot check at 100 percent, not the other way around.
Keep texture. Pores, faint lines, and stubble are what tell a viewer they are looking at a person. Once those are gone the face reads as a render, and no amount of grain added back afterward fixes it. Our guide to smoothing skin without looking fake goes deeper on the specific tells.
Check the motion, not the still. Scrub through a laugh, a lean-in, and a moment where someone turns to the other host. Static frames hide the problems that show up when a face moves fast.
Expect compression to add its own softening. Upload a high-bitrate master and let the platform do its thing, but assume the published version reads a little smoother than your export did.
Before you publish
- Both people evaluated separately, not judged off one person's frame.
- Facial hair, eyelashes, and hairlines still crisp on both faces.
- Nothing smearing when someone turns fast or leans out of frame.
- Skin tone still matches hands and neck. If the face got lighter than the hands, back it off.
- Reviewed at normal size on a normal screen, not just at zoom on your grading monitor.
- An unprocessed master kept somewhere, in case you want to redo it in a year.
FAQ
How do I smooth skin in a podcast video with two people?
Treat each person as a separate job. Two people almost never share the same skin tone, lighting, or camera, so one
global setting flatters one of them and overcooks the other. If your recording platform saved isolated tracks per
participant, process each track with its own settings before you edit. If you only have a single mixed program file,
use a tool that builds an independent skin mask per detected face rather than one blur applied to the whole frame.
Should I use a real-time beauty filter or fix skin in post?
Use a real-time filter when the stream itself is the deliverable and nobody will re-edit it. Use post-production when
the recording becomes a YouTube episode or clips, because a real-time filter is baked into the file permanently. You
cannot dial it back later, and any artifact it created during a fast head turn is now part of your master.
Can DaVinci Resolve smooth skin for two people?
Yes. DaVinci Resolve Studio includes Face Refinement, which detects a face, builds masks for facial areas, and tracks
them. For independent control over two hosts, use separate face-specific effect setups so each person can have different
settings. That works, but it multiplies the setup across angles and cuts in a long episode.
Do I need to retouch every clip in a long podcast edit?
No, and that is the main reason to do the work before the edit. If you correct the raw camera or participant files
once, every cut you make afterward inherits the correction. Retouching on the timeline means re-applying, re-tracking,
or re-checking the effect on every clip instance, which is where hour-long episodes get expensive.
Will skin smoothing survive YouTube compression?
Partly. Compression softens fine detail on its own, so a correction that looked mild in your editor can read heavier
after upload. Judge the result at normal viewing size rather than at 300 percent zoom, keep pores and facial hair
visible, and export a high-bitrate master so the encoder is not fighting your correction.
VanityFilter runs offline on Windows and has no subscription. See current pricing.